Category Archives: Beginner Chess Tips

Chess Opening basics: Ruy Lopez (or the Spanish opening)

0
Filed under Beginner Chess Tips, Chess Basics, Chess lessons, Chess Opening, Chess Tutorials
Tagged as , ,

Though traced back to the 15th century, this opening came into prominence in the middle of the 19th century. Since then, it has remained ever popular and is frequently seen in tournaments. It takes its name from a Spanish clergyman of the 16th century Ruy Lopez who made a systematic analysis of this opening. The basic ideas are easy to understand and the strategic and tactical possibilities appeal to players’ imaginations, giving rise to a large number of variations. New ideas or modifications of old ones keep coming up and these have helped to retain interest in this opening.

The present discussion, though made with reference to Ruy Lopez because of its wide prevalence, is to show you how you can analyze openings to understand the issues involved. An introduction to Ruy Lopez was given earlier, this description takes it a little more forward and shows the moves step by step that may appeal to the very beginners.


The diagrams on the left show the main line of play. Those on the right, when they appear, show the possibilities after the last main move.


basic idea 
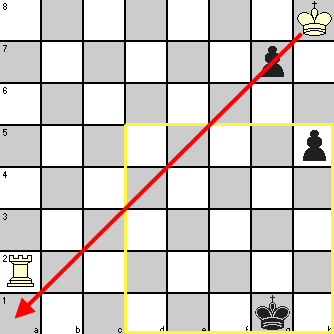
All openings aim to achieve a control of the center i.e., control of the four squares d4, e4, d5 and e5 as marked out in the diagram. You may like to refer to point 4 under positional strategies in 50 Strategies to gain the upper hand over your opponent.
1. e4 RuyLopez_first_move White KP is trying to take control of d5 and f5
1. … e5 RuyLopez_black_first_move Black likewise counters with aim to control d4 and f4
2. Nf3 RuyLopez_white_move2 This tries to wrest control of e5 by attacking the black pawn and exerts control on d4
2. … Nc6 RuyLopez_black_move2 This defends the e5 pawn and holds on to its share of control of the center and challenges White’s control on d4
3. Bb5 RuyLopez_white_move3 The starting of Ruy Lopez. This indirectly tries to seize control of center by attacking the defender knight of the e5 pawn. If this Knight is removed, White will be able to capture Black’s e5 pawn
 
This move also indirectly prevents Black to move his QP (which would help Black to support his KP and free the line for his QB) because the Knight will be pinned against the King.
3. … a6 RuyLopez_black_move3 This move is known as Morphy Defense, apparently ignoring White’s threat. After this move, Ruy Lopez variations get into two broad categories, one with 3. … a6 and the other without this move.
 
This move tries to drive White’s KB away, preparing the way for b5 at some stage that will force the Bishop to abandon its attack on black QN. But such pawn moves create some weakness in Black’s pawn structure while retaining his hold on his KP.
4. Ba4 RuyLopez_white_move4 The Bishop retreats while still retaining its attack on the Knight.
 
You may ask: why not capture the Knight after what was said at move 3?
This is because of the following possibilities.


4. Bxc6 If the Bishop captures the Knight … RuyLopez_white_alt_move4
4. … dxc6 … the QP captures the Bishop … RuyLopez_black_alt_move4
5. Nxe5 White Knight captures Blacks KP … RuyLopez_white_alt_move5
5. … Qd4 … Black Q attacks both the White Knight and Pawn at e4 and in trying to save the Knight, White has to surrender his e4 pawn and its control of the center. Black may have got doubled pawn on c-file but retains the advantage of having both Bishops.
 
Black has another alternative also …
RuyLopez_black_alt_move5
5. … Qg5 … Black Q attacks both the Knight and g-pawn and thus gets compensation for the loss of his KP.
 
So White’s immediate capture of Knight with Bishop at move 4 does not give any benefit but it can be done after his KP is supported. Black has to watch out for such moves by White.
RuyLopez_black_second_alt_move5


4. … Nf6 RuyLopez_black_move4 Secure in the knowledge of above possibilities, Black is not worried about his KP for the present and tries to make a counter-attack on White’s KP to wrest control of center.
5. 0-0 RuyLopez_white_move5 It is now White’s turn to disregard Black’s threat and proceed with castling to secure his King’s position and bringing KR into play.
 
Why is the threat not considered? The following possibilities show that.


5. … Nxe4 If Black Knight captures the KP … RuyLopez_black_alt_move5
6. Re1 … The Rook attacks the Knight and captures Black’s KP when the Knight moves away.
 
Alternatively …
RuyLopez_white_alt_move6
6. d4 … White’s QP directly attacks Black’s KP … RuyLopez_white_second_alt_move6
6. … exd4 … if Black tries to capture White’s d-pawn … RuyLopez_black_second_alt_move6
7. Re1 … White Rook pins the Knight against Black King RuyLopez_white_alt_move7


5. … Be7 RuyLopez_black_move5 Being aware of above complications, Black places a guard in front of the King which also develops the Bishop and opens the line for castling.
6. Re1 RuyLopez_white_move6 This provides support to the KP and thereby reinstates the initial threat of Bxc6 posed at move 3. At this time, White had three other options to support his KP viz. …


6. Qe2 … support by the Queen … RuyLopez_white_alt_move6
6. Nc3 … support by the QN … RuyLopez_white_second_alt_move6
6. d3 … support by the QP RuyLopez_white_third_alt_move6


6. … b5 RuyLopez_black_move6 Black is aware of the revival of the threat against his Knight at c3 and thereby on his KP, so he parries the threat by attacking the Bishop
7. Bb3 RuyLopez_white_move7 The Bishop has to retreat but now has a line to Black’s vulnerable f7 square
7. … d6 RuyLopez_black_move7 The e5 pawn is supported further and lines have been opened for developing QB
 
Black has the option of castling now and playing d6 on the next move.


This is the main line of Ruy Lopez Closed Defense, Classical Variation. It can be seen that Black’s 3. … a6 is instrumental in maintaining his e5 pawn and so long as Black is able to hold on to his KP and thereby a control on the center, his position is satisfactory. If the KP gets exchanged, strategic advantages accrue to White.

You can see that even within a span of 7 moves, so many different possibilities may arise including the strategic and tactical considerations that come into play. Any opening that you plan to follow should be analyzed this way to find the inherent strategies with positive and negative aspects. Your play should be consistent with the strategies to get the maximum benefits till you reach the middle game when you are on your own.


Chess Tactics in Middle Game: Might of united Passed Pawns

1
Filed under Attacking tactics, Beginner Chess Tips, Chess lessons, Chess Strategy, Chess tactics, Forks, General Chess, Tactics Practice
Tagged as ,

You have seen how chess tactics was used for utilizing the power of a passed pawn to settle the outcome of a chess game. Let us now look at another game showing the greater might of united passed Pawns that Black obtained by sacrificing his pieces.

If you sit back and think, you will realize that such sacrificial moves, though looking so spectacular, are essentially not a sacrifice but only a long-term investment. Giving up one Rook for a Pawn and another Rook for a Bishop to get a passed Pawn that becomes a Queen is actually getting better of the bargain (Queen and bishop against two Rooks)! The brilliancy lies in identifying the possibility and deploying suitable chess tactics to make it a reality.

The position shown below was reached after 26 moves and Black initiated his combination with a stunning move that earned its place among the best moves in chess history.

chess tacics in middle game for united passed pawns

As suggested before, see if you can find the move on your own after White played 27. Ng3, though this time it should not be difficult with the hint that you have got already. But finding the sequence of moves in the combination may prove to be more difficult.

Here is how the game went from the above position.

1. Ng3 Rxe3  
2. Bxe3 Rxe3  
3. Nxh5 Nxh5  
4. Qxh5 Bc6  
5. Qg5 Rxc3   From a semi-passed QNP, Black has now got united QNP and QBP, albeit by giving up Rook against Bishop and Pawn and another such exchange to follow in next two moves
6. Qd2 Rxc2  
7. Rxc2 Ne6   Black threatened the last of White’s center pawns and White has to guard it
8. Rd1 b4   The passed pawns have started exerting their power
9. Rb2 b3  
10. Qc3 Nc7  
11. Re2 Qa7  
12. Qb4 Nb5  
13. Re7 Qa3   With those menacing passed pawns having the support of the Knight, Black could afford to exchange Queens, but not White
14. Qe1 c3   But the Pawns go marching in! Black does not care if White wants to exchange his Rook for Black’s Bishop and Knight in the supreme confidence that two connected passed pawns on their 6th rank cannot be blocked by a Rook and Black Queen is there to take care of any interference by her counterpart!
15. Re8+ Bxe8  
16. Qxe8+ Kh7  
17. Qxf7 Qa8   But White had a more sinister plan to salvage a draw and so went for Black’s KBP rather than his Knight! Black rose to the occasion to thwart White’s plan of salvaging a draw. For example: 17. … c2 18. Qh5+ Kg7 19. Qe8+ Kh7 20. Qh5+ Kg7 and draw by perpetual check. It shows that you can never be too careful even in a won position!
18. Re1 Nd6   Threatens the Queen and guards the vulnerable e8 square
19. Qc7 c2   With immediate threats taken care of, Black resumes the pawn march without bothering about the Knight
20. Qxd6 b2  
21. Qf4 Qc6  
22. Resigns  


Chess Endgame Tactics: Rook and Pawn endings – Part 1

0
Filed under Beginner Chess Tips, Chess lessons, Chess Strategy, Chess tactics, Endgame Tactics, Forks
Tagged as ,

All is well that ends well is probably at its truest in case of chess endgames! The endgame is the phase where the amateurs are at greatest disadvantage against experienced opponents. They are often at a loss on how to move or position their few pieces and pawns, with the result that they lose or draw games that should have been won.

We have discussed about the general principles of the endgame tactics that should be adopted in different kinds of endings though these were for King and other pieces against a lone King. But amongst the endgame situations that occur in chess games, Rook and Pawn endings are by far the most common and so you should learn the specific tactics that will help you in handling different types of such endings effectively.

In fact, knowing these patterns is helpful for deciding on your action plans. If you know that the situation is favorable, you will persevere to get the win. But if the position is a theoretical draw, you can settle with your opponent without wasting time and effort.

The knowledge of such patterns also helps you to decide on your strategy even before entering the endgame phase. Depending on the chessboard situation, you can exchange and/or move pieces and pawns to reach the pattern that is best possible for you.

Let us now examine some basic positions in Rook and Pawn endings. One fundamental tenet is that a Rook is helpless against two connected passed pawns that have reached the sixth rank.

White to move and win:

Rook and Pawn ending type 1

  1. g7 Rc8    
  2. f7 Rb8+    
  3. Ka6 Kc6    
  4. g8=Q      

In the following position, White will win no matter who has the first move. Check for yourself.

Rook and Pawn ending type 2

But had the Black King been ahead of the pawns to cooperate with his Rook, both White pawns would be captured and Black would win.

Let us now look at King, Rook and Pawn against King and Rook. There are various possibilities.

Rook and Pawn ending type 3

We remind you again about what we said on Chess Strategies for positioning your Rook with reference to your passed pawn. Rook behind your Pawn adds power to it, Rook in front of it makes both immobile. The above is a typical situation which results in a draw. The White Rook cannot come out as the Pawn will get captured. If White King tries to go towards its Pawn, it will not get any shelter against Black Rook’s checks!

But Black has to ensure that the King remains on the seventh rank. If it were on, say, the sixth rank, White Rook would gain a tempo by delivering a check, and the Pawn gets promoted on the next move. Black will lose his Rook against the promoted Queen and White King and Rook will win against the lone King.

Even on the seventh rank, Black King must not stray beyond one square from the edge. See what happens otherwise.

1. Kg2 Kg7
2. Kf2 Kf7
3. Rh8 Rxa7
4. Rh7+ skewers the Rook and wins the game

The presence of other pawns on the board may sometimes mask the position containing above theme. If you can identify it and can make your pawn moves, even sacrificing those as necessary, in such a way that the enemy King is exposed and forced to move to the sixth rank or two squares away from the edge, you can apply above tactics to capture the Rook. Of course, you should be sure that the result of exchanges will not allow your opponent to get one of his pawns to reach position of promotion!

In Endgame Tactics for Rook and Pawn Endings Part 2, we will discuss some more endgames with Rook and Pawn.

Chess Endgame Tactics: some fine points

0
Filed under Beginner Chess Tips, Chess Basics, Chess lessons, Chess tactics, Chess Tutorials, Endgame Tactics, Forks
Tagged as

In the article suggesting the best way to learn endgame tactics, we laid more stress on endgame plays by top players than on chess problems and chess studies. But at the same time, we pointed out that some of these problems and studies could benefit you in developing ideas on some finer endgame tactics like “underpromotion”, gaining tempo etc., some of which may appear in the same problem or study.

Here we will show you some creative ideas that can stand you in good stead in your actual endgame plays.

importance of tempo in endgame

In this study by Moravec, White is required to play and win. To decide on your tactics, you should analyze as follows:

  1. Even with the first move applied to White K to chase the Black RP, it will remain two moves outside ‘the Square’ for that pawn. So if Black continues to push RP, White K will only be on rank 3 when RP reaches h1 to get promoted.
  2. If White so wants, his K can capture the Black NP in its stride towards the RP
  3. When White K reaches g3 (after Black RP has reached h1 to become a Queen), Black on his next move cannot deliver a check by his Q with support from his K because of the White R controlling rank 2. Black thus loses a tempo!
  4. White on the next move can deliver check by Ra1 and because of his K on g3, will cause checkmate! If on the previous move, Black tried Kf1, then check by Rook will result in his loss of Q!
  5. At step 3, Black Q could go to h8 to control a1-h8 diagonal and the square a1 preventing Rook’s check (and thus retaining the tempo) – provided there were no Black P on g7 blocking that diagonal!
  6. The conclusion is: White K must not capture the NP at step 2 so as to deny Black any tempo after pawn promotion, which in turn gives him the tempo for delivering checkmate or capturing Black Q!

Once you have understood the idea, the sequence of moves become clear.

1. Kh7 h4   not 1. Kxg7
2. Kg6 h3  
3. Kg5 h2  
4. Kg4 h1=Q  
5. Kg3   White wins with 6. Ra1+


But Black had a resource that would make White’s win extremely difficult. This comes out of an attempt to gain tempo as shown below!

4. Kg4 g5   unblocks the a1-h8 diagonal
 
5. Kg3 h1=N+   The under-promotion to Knight gains tempo for Black as White K has to move. White’s K and R against Black’s K and N gives difficult theoretical win for White.


use of opposition and zugzwang

The above is a study by Lasker but this type of Rook and Pawn ending may come up in actual play. So you should note in the following moves how White combines ‘opposition’ by his King and check by his Rook to push White King away from Black’s QBP while not allowing Black to give check along any row.

1. Kb7 Rb2+  
2. Ka7 Rc2  
3. Rh5+ Ka4  
4. Kb7 Rb2+  
5. Ka6 Rc2  
6. Rh4+ Ka3  
7. Kb6 Rb2+   If 7. … Kb3 8. Kb7. If 7. … Ka2 8. Rxh2
8. Ka5 Rc2  
9. Rh3+ Ka2  
10. Rxh2   White gets Queen giving up his Rook and wins


Chess tactics: Which masters to study?

0
Filed under Attacking tactics, Beginner Chess Tips, Chess Basics, Chess lessons, Chess Strategy, Chess tactics, Chess Tutorials, Defensive strategy, Forks
Tagged as ,

There is no doubt about the necessity to become familiar with the elements of a combination which we understand as chess tactics. In the article gameplan part2, we have listed the elements for you to find examples on each item and study those thoroughly to build up your repertoire. However good you may be in chess strategy and planning your game, you need to employ tactics to give effect to those.

So the question in any beginner’s mind will be: how do I learn to use chess tactics? My answer will be: after you know the elements, study the games of chess masters who excel in combinational play and chess tactics. That is why we have already shown you many such games where the tactics reigned supreme. There are quite a good number of articles at this site and trying to put a link to all those will clutter up this article. You have to search those out through the site map.

The next question obviously is: which masters to study? There are hundreds of Grandmasters and International masters, past and present, and it is true that all of them deploy chess tactics in their games. If you have to study all those, when will you get the time to use those in your play? That is why we need to be selective and choose games from players who excelled in the area of chess tactics and complex combinations. Different people have their own favorites but I am quite sure that some of the names we suggest will occur in every such list! Their names are given in chronological order

Adolf Anderssen (1818-1879)

No one has ever played chess like Adolph Anderssen, nor won as much fame and glory for his charismatic style. Anderssen’s hallmark is the direct (and often spectacular!) Kingside attack.

Emanuel Lasker (1868-1941)

The main contestants of his time like Tarrasch and Janowski complained that they could not understand his play and implied that Lasker’s success was due to dubious tricks. Fact is, Lasker was much ahead of his time in his style of play, which found acceptance with later generation of players.

Frank J. Marshall (1877-1944)

He earned a lot of brilliancy prizes by virtue of his daring gambits and sacrificial play. One of his moves is held as one of the top three best moves ever played on a chessboard! Though spectators enjoyed his slash-bang techniques, purists held that some of his moves produced results by virtue of their shock value and not because of deeply calculated combinations. That may be the reason why he never became a world champion but managed to defeat all top players of his time.

Rudolf Spielman (1883-1942)

He was a master of attack with beautiful ideas and brilliant daring play full of sacrifices.

Alexandre Alekhine (1892-1946)

He is one of the greats among world champions and was at home in different styles of play. He was a master of complex positions and well-calculated combinations. Many of his games are still analyzed and experts have not reached a common verdict because of the complexities involved.

Mikhail Tal (1936-1992)

He is one player who probably earned the maximum admiration from the contemporary greats in chess. Tal used some self-derogatory comments about his own play by saying that there were two kinds of sacrifices – the sound ones and those used by him! Botvinnik, a world champion, said that it was not possible to tackle Tal if his pieces were mobile and active with some space and that is why he used to play close positions against Tal. He went on to say that if Tal could have some self-control, it would be impossible to play against him. A player of the stature of Kramnik went so far as to say that analyzing Tal’s game was like discussing what God looked like! When you play through his games, you will wonder if those bolts from the blue were results of intuition or pre-calculated combinations!

Bobby Fischer (1943-2008)

He was a chess genius and many experts believe that had he not gone into self-exile, he could have been the undisputed top player in chess history! He has produced many beautiful games with a long combination the results of which were not easy to see even by top masters. Boris Spassky who played Fischer in the famous championship match commented that playing Fischer was not a question of your win or loss, it was a question of your survival!

Garry Kasparov (1963- )

Another chess genius and holds the highest ELO rating among chess Grandmasters. He is also a versatile player and can play well-calculated combinations.

Alexei Shirov (1972- )

Among the mew generation players, he is noted for his attacking style and creating complications that remind one of Tal, not surprisingly, because he studied under Tal.

Now you know the names of some of the chess masters who have consistently produced great combinations in their plays. But many of them have played hundreds of games, so which ones to study? Go for their best games, some compiled by other chess authors or chess masters and some by the players themselves. These books generally include about 50 to 100 of the best games in their career and studying those few is not a very massive task! Keep a note of the basic principles that have been applied or violated in these games (many brilliancies arose to exploit mistakes by the opponents). These types of controlled study will not only help you to improve your play, but will also provide enjoyment for many years to come!