Category Archives: Beginner Chess Tips

Chess Opening: Control of Center – Part 3

Filed under Beginner Chess Tips, Chess Basics, Chess lessons, Chess Opening, Chess Strategy
Tagged as , , ,

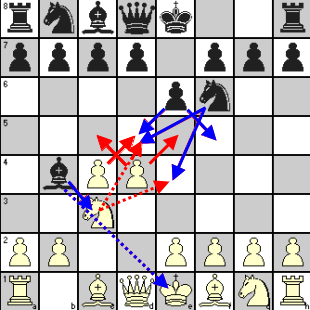
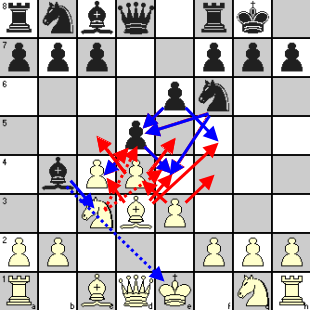
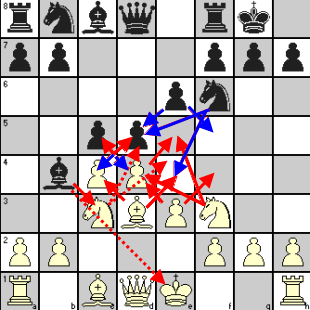
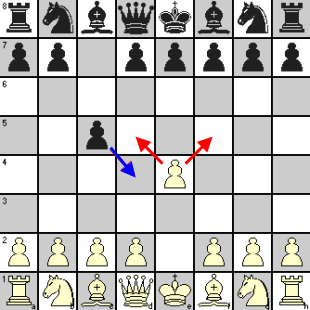
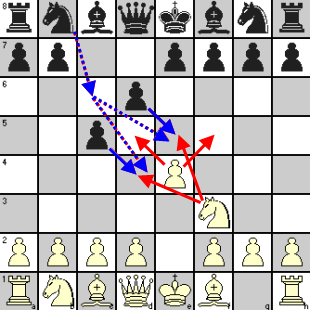
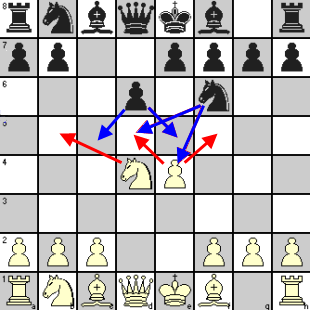
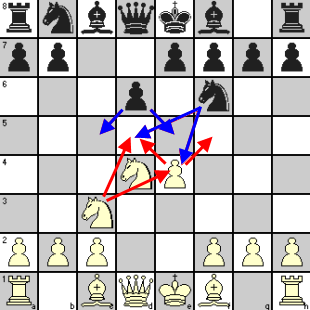
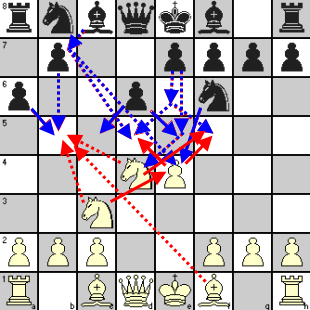
In continuation of Chess Opening: Control of Center to show how different openings aim to control the center squares, we now examine the opening strategy behind Queen’s Gambit Declined. This opening has been considered as one of the most reliable defenses of Black against White’s d4. The position reached by the moves described here can be achieved through many other sequence of moves. All these QGD openings are covered under ECO codes D30-D69 and all aim to create a foothold in the center by advancing pawns or using pieces while developing them.

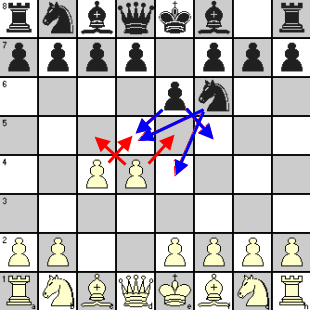
The main idea for White is to offer a gambit of QBP as a temporary sacrifice, which weakens Black’s hold on the center whereas Black declines this offer and goes for a solid build-up. His pawn move e6 helps in this and facilitates the development of his KB but has the disadvantage of blocking his QB, the freeing of which remains a headache for Black.
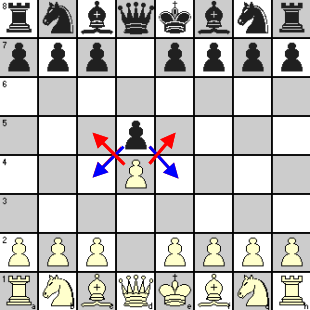
QGD1
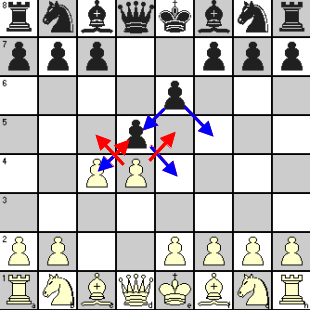
1. d4 d5   White takes control of the central square e5 and semi-central c5. Black does same for e4 and c4.
 
QGD2
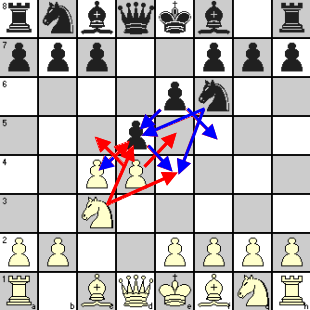
2. c4 e6   White offers a pawn but this sacrifice is only temporary as White can recapture the Black pawn soon. This gambit and refusal by Black to accept it gives the name to this opening. Black just continues to strengthen his center position.
 
QGD3
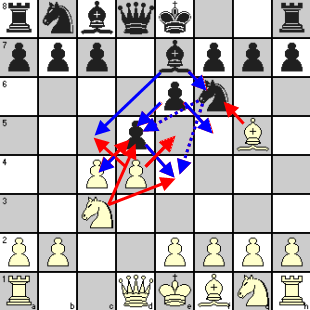
3. Nc3 Nf6   The development of these Knights cancels out each other’s influence on e4 and d5 squares to maintain status quo at center.
 
QGD4
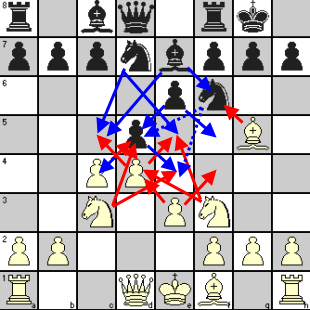
4. Bg5 Be7   White creates an indirect pressure on e4 and c5 by pinning Black’s KN and nullifying the Knight’s influence on the center. Black simply removes the pin while developing his KB and clearing the way for castling.
 
5. e3 0-0   White goes for strengthening his center and opening the lines for developing his KB. Black takes this opportune moment to safeguard his King.
 
QGD5
6. Nf3 Nbd7   These create pressure and counter-pressure on e5 square. Additionally, White Knight supports d4 pawn and the QB and Black QN supports KN and the c5 square. White should remain aware that his QB is in the firing line of Black’s KB and Queen.


White will try to take advantage of the inactive QB while Black has to find a way to activate it or exchange it to free his position. One way to free the QB is to push KP to e5 but Black first needs to exchange his QP to avoid its getting isolated. Other alternative is to bring it out via b7 after playing b6, but it becomes essential to play c5 to maintain a balance at center.

Black usually refrains from exchanging his QP with White’s QBP as it surrenders the center, but can do so when he gets some advantage out of it like gaining a tempo in attacking White’s KB if it moves to d3. Black also uses pawn move c5 to attack White’s center. After an exchange of Black’s QP and White’s QBP, White gets a majority in the center While Black gets a Queenside pawn majority and each player tries to utilize the respective advantages to launch their attacks.
Chess Opening: Control of Center – Part 2

Filed under Beginner Chess Tips, Chess Basics, Chess lessons, Chess Opening, Chess Strategy
Tagged as , , ,

In Chess Opening: Control of Center – Part 1, we looked at two popular KP openings to understand how those resolved the tussle between White and Black for control of the center. Here we take a similar look at a common QP opening to realize the chess tactics involved in this case.

Nimzo-Indian Defense
The classical theories on the strategy of chess openings, as formulated by the first undisputed World Champion Wilhelm Steinitz (1836-1900), was further refined by Dr. Siegbert Tarrasch (1862-1934). These stressed the importance of center control by occupation or by direct application of pressure on those squares by using pawns, developing pieces to support that control, and playing to obstruct opponent’s plans in this regard.

It was Aaron Nimzowitsch (1886-1935) who challenged these conventional and fairly universal ideas with his own in My System, which was probably the most widely read book on chess theories. His system found expression in several openings that bear his name, and Nimzo-Indian Defense happens to be the most important among his hypermodern theories and very widely used in master games till today. It appears that the defense was first played in a Rubinstein-Alekhine game at Leningrad in 1914 (won by Black in 28 moves).

What is significant in this opening is that Black does not commit any pawn structure at the start, thus retaining considerable flexibility. Black exerts control on the center indirectly from a distance by use of his pieces and also undermining the influence of enemy pieces on the center.

Let us see how all this is accomplished.


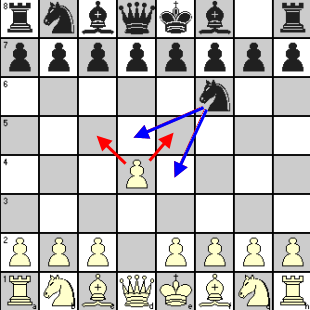
nimzo-indian1
1. d4 Nf6   White wants to control the central square e5 and semi-central c5. Black applies pressure on d5 and e4 by the Knight (a direct control would need Black to play d5, which normally leads to Queen’s Gambit opening).
 
nimzo-indian2
2. c4 e6   White now counters Black’s pressure on d5 by his pawn move and Black uses his KP to strengthen his hold on d5.
 
nimzo-indian3
3. Nc3 Bb4   White develops his QN, adding to the pressure on d5 by his QBP and exerting a measure of control on e4. Black again goes the indirect route to nullify the influence of White QN on d5 and e4 by pinning it. Black also creates the possibility of exchanging his KB with White’s QN, surrendering the advantage of Bishop pair to create a liability of doubled pawn for White on c-file.


In this defense, Black generally puts his QB in fianchetto by playing b6 and Bb7, applying the Bishop’s influence on the long diagonal including the center squares d5 and e4 in harmony with his KN.

If Black exchanges his KB with White’s QN, his strategy will be to close the center to minimize White’s advantage of Bishop pair. You know that an open game gives a great advantage to player having two Bishops and obviously White’s strategy will be to go for such a game.

At this stage, 4. e3, a quiet looking move, is considered to be White’s most potent weapon against Nimzo-Indian Defense. 4. Qc2 (with the idea to retain Bishop pair without doubling of pawn) and 4. a3 (a venturesome continuation and forcing Black’s hand to play 4. … Be7 or 4. … Bxc3) are also playable. Kasparov used 4. Nf3 (a kind of wait-and-watch move) to considerable success against Karpov in their championship match.

To remain within the ambit of our article, we will consider the normal variation only.


4. e3 0-0   White consolidates his QP and goes for development by opening a line for his KB.
 
nimzo-indian4
5. Bd3 d5   White is building up his pressure on e4 and will aim to place his KP there. Black continues with his center control by advancing QP.
 
nimzoindian5
6. Nf3 c5   White KN increases his control on e5, but Black undermines the pressure by threatening White’s QP with his QBP.
 
7. 0-0   White has completed his initial development and in case of doubled pawn due to Black exchanging Bishop with Knight, White can hope to undo it if Black takes his QP. Otherwise White can capture with his Knight to position it centrally. Black does not have any problem in completing his development and his share of center offers many chances of counterplay.


In Chess Opening: Control of Center – Part 3, we will see how the another important QP opening viz. Queen’s Gambit Declined goes about the struggle for the center.

Chess Opening: Control of Center – Part 1

Filed under Beginner Chess Tips, Chess Basics, Chess lessons, Chess Opening, Chess Strategy
Tagged as , , ,

The theory behind all chess openings is to control the center comprising the squares d4, e4, d5 and e5, and the development of pieces that goes with it. Control of the center by one player helps him to position his pieces more effectively while thwarting the development of opponent’s pieces. You can easily imagine that such a control with its associated benefits can facilitate your win to a great extent.

This control can be achieved in three ways:

  • Firstly, by occupying those squares with your pawns and pieces.
  • Secondly, allowing your opponent to occupy the center and then attacking and undermining the position.
  • Lastly, exerting control from a distance by means of pieces like Knights and Bishops without directly occupying those center squares.

This control of a square is also known as ‘applying pressure’ on the square by threatening to capture any enemy pawn or piece that may venture to occupy the square.

In Chess Openings: the most popular ones, we tried to show you the most common first moves at the start of a chess game. But you must have noticed that the baker’s dozen of most popular types can ultimately lead to hundreds of different openings, going by the ECO codes that incorporate those opening moves. If you examine any of these openings through the moves that follow, the theme of center control will become apparent by the use of one of the three opening tactics described above.

To see how the different chess openings aim to achieve center control and their pros and cons, let us check four types which are related to the most frequent first moves described in Chess Openings: the most popular ones. Incidentally, two of these openings start with pushing the KP (1. e4) and the other two with QP (1. d4), so a fair representation is made!

We will examine with reference to the following openings:

1. e4-c5 (Sicilian Defense)
2. e4-e5 (Ruy Lopez)
3. d4-Nf6 (Nimzo-Indian Defense)
4. d4-d5 (QGD or Queen’s Gambit Declined)

However, since Ruy Lopez has been discussed earlier in Chess Opening basics: Ruy Lopez, we will examine the other three in this and the next article.

Sicilian Defense:
It has become the most popular choice at master level as it eminently suits a fighting player with Black pieces. As can be seen from the number of ECO codes, there are many variations possible, but here we will consider the Najdorf variation which has become very popular with players like Fischer and Kasparov going for it in a big way.

sicilian1
1. e4 c5   White wants to control the central square d5. Black in turn applies pressure on d4 against advance of White’s QP.
 
sicilian2
2. Nf3 d6   White creates his own pressure on d4 and also on e5. Black’s pawn move opposes this pressure on e5. Here, Black could also play Nc6 which would counter the White KN’s influence. Retaining a control on d5 is a key theme for Black in Sicilian defense in order to free his position by moving his QP to d5.
 
3. d4 cxd4   White does not want to lose initiative, so goes ahead with his QP advance and Black immediately captures the pawn to deny White the hold on the center squares.
 
sicilian3
4. Nxd4 Nf6   White recaptures and positions his KN on a center square. White gets control of half-open d-file while Black gets half-open c-file as also a pawn majority at center. Black now develops his KN threatening White’s KP and exerting pressure on d5.
 
sicilian4
5. Nc3   White counters Black’s plans by bringing out his QN which gives support to his e4 pawn and bolsters his hold on d5.
 
sicilian5
5. a6  


For the first time, Black seems to have deviated from the struggle for the center through this defining move for Najdorf variation of Sicilian Defense. What is the idea behind this apparent deviation?

By this move, Black denies b5 square to White‘s Knights and KB. It also prepares for Black’s pawn move to b5 to start a Queenside action and positioning his QB to b7 from where it can bring pressure on d5 square and White’s e4 pawn.

After this, White may generally choose from the sharpest line with 6. Bg5 to quieter, positional games with 6. Be2, and others lying in between like 6. Be3, 6. f3, and 6. Bc4. But further analysis of all those moves will take us into a full discussion of Sicilian Defense, which was not the idea behind this article. We only wanted to show how any opening theory tries to achieve center control and if you understand the means and follow the principles, you will be in the right lines without a need to memorize too many moves!

In next two parts of Chess Opening: Control of Center, we will see how this is achieved in two popular QP openings viz. Nimzo-Indian Defense and Queen’s Gambit Declined.

Chess Openings: the most popular ones

Filed under Beginner Chess Tips, Chess lessons, Chess Opening, Chess Tutorials, General Chess
Tagged as , , ,

As all chess games start with a first move by White and then Black has to decide on his response. It is not surprising that the most common questions from beginners are related to the openings they should adopt when playing as White and the appropriate responses when playing as Black.

In 10 steps to raise your game, we discussed about the general issues that should be considered in taking such decision. You should also be familiar with the principles of good chess strategies as the opening moves lay the foundation of the kind of game you are likely to have with its advantages and disadvantages.

All chess openings aim to achieve certain strategic targets as have been discussed in Chess
Strategy and Chess Tactics in a nutshell
as also in Classical Opening Principles in Chess. But as your opponent also has his targets which will try to nullify yours, it is not possible to achieve all the ideal strategic goals unless your opponent is playing badly! Normally, you gain advantages in some areas while conceding some to your opponent. The theoretical ideas behind the openings from both White’s and Black’s sides try to balance these gains and losses.

When playing as White, you will naturally try to play the opening moves that give you a decided advantage. But if your opponent is as good as you are, he will obviously not allow you to follow those lines and choose his moves to take you to areas that give him at least equality at the end of the opening phase. So whatever you may adopt as the opening of your choice, learn the underlying ideas and play to fulfill those to the extent possible. The same goes for you playing as Black in preparing the responses against White’s moves.

After saying all these, we are now giving a list of the most popular opening moves by White and corresponding responses by Black as per the basic data available at Wikipedia but spread over its different pages. What we have done is to make a gist by combining those data to give you a kind of ready reckoner for the most popular combination of first moves by White and Black and the ECO codes that relate to those first moves. We have included only those first moves which are estimated to occur in at least 2% of the games used by Wikipedia to prepare the statistical data. It appears that the following set of first moves cover 86% of the games.

White’s 1st move Black’s response Frequency ECO codes Nature of Game
e4 c5 18% B20-B99 Semi-open
e4 e5 11% C20-C99 Open
e4 e6 6% C00-C19 Semi-open
e4 c6 3% B10-B19 Semi-open
e4 d6 2% B07-B09 Semi-open
e4 d5 2% B01 Semi-open
d4 Nf6 20% A45-A79, D70-D99, E00-E99 Semi-closed
d4 d5 10% D00-D69 Closed
d4 e6 2% D31-D49 Semi-closed
Nf3 Nf6 5% A05 Flank opening
Nf3 d5 3% A06-A09 Flank opening
c4 Nf6 2% A15-A19 Flank opening
c4 e5 2% A21-A29 Flank opening


You can understand that after these first moves, the subsequent moves can take you to a wide variety of openings as apparent from the number of ECO codes shown against each set of first moves. The nature of game that may arise is only a broad indication. From the applicable ECO codes, you may choose one or several lines of play that most suit your personal preferences.


Looking to find the best chess combination in a middle game position

Filed under Attacking tactics, Beginner Chess Tips, Chess lessons, Chess tactics, Chess Tutorials
Tagged as , , ,

In my view, all chess players get some inspirational ideas from time to time enabling them to produce that game of a lifetime! But since you will like to win on other days also, you cannot solely depend on that stroke of imaginative tactical ideas. You have to find some ways to make your perception work for you to produce, if not a brilliancy, at least a good combination or chess tactics whereby you get an upper hand over your opponent. In Chess Tactics: Method Approach to Calculating Combinations, we presented some methodical approach to find chess tactics that can yield better results on an average.

Lest you come to a wrong conclusion of this being a surefire way to create your combinations, we again stress that the method approach to chess tactics may not be possible for all situations by average players. In several earlier discussions, we have shown where even top Grandmasters could not find the winning move in a particular situation. You may go through Chess Tactics: The role of memory to see how Smyslov failed to find the move that enabled Chigorin to win in a similar situation 40 years earlier.

One of the reasons of failing to see some combinations is our mental block on certain possibilities. A Queen is such an important piece that we automatically assume that when the Queen is under attack by a Pawn/Knight/Bishop/Rook, the defender will try to protect it. That the Queen may have been marked for a sacrifice generally escapes our mind.

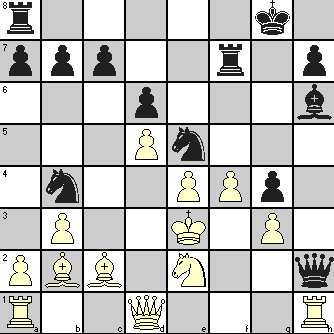
Let us see if the method approach would enable us to find the combination employed by Nezhmetdinov against Polugayevsky in the diagram position that was discussed in Importance of chess strategy – Part 2.

preparing for a Queen sacrifice

In the referred article, you have seen how the game proceeded after White had accepted the Queen sacrifice. Let us see if we can find what prompted Black to make the sacrifice.

Using the system we discussed in Chess Tactics: Method Approach to Calculating Combinations, what can you see in the above position? What are the escape squares for White King? Only d2 and d4, but d2 will not be available if the White Knight moved, which can be induced by an attack on the f4 pawn in the firing line of Black’s Bishop and Rook. Once the Knight moves, Black King loses the escape hole at d2 and now a check by Nxc2+ will take away d4 also. So the King gets checkmated unless White Queen is forced to capture the Knight by Qxc2, and that means losing the Queen because of Black’s Qxc2 with mate threat still looming large!

Therefore, you would expect White to capture the Queen, may be just because it is available (!) or because of seeing through aforesaid combination. After Black plays Rxf4, White has to decide between capturing Black Queen or Black Rook! We have seen how capturing the Rook affects White (he may resist moving the Knight by playing gxf4 but then Bxf4+ leaves no alternative!) and so we would bank on White’s Rxh2. We need not break our head on further analysis as Nezhmetdinov showed the way! (Refer Importance of chess strategy – Part 2)

Are we getting somewhere in using this type of method approach? Let us take up another example to see if it helps there also.

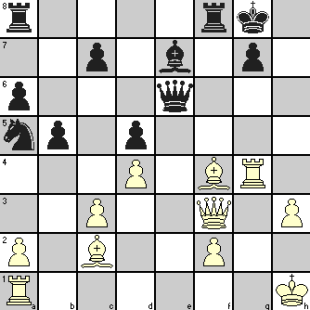
finding a mating combination

On previous move, White QB captured a pawn at f4, forcing Black to move his Queen from h6 to e6. It is White’s turn now. It will be apparent that Black is not posing any worthwhile threat. Black King has only three escape holes at f7, h7 and h8 in case of a check along g-file, possible by Rxg7 and then by Rg1 (after the King captures the Rook). White Queen can move to h5 square with check to deny all those three squares to Black King if it moves to f7 and Black’s Queen and other pieces are unable to prevent it. If the King tries to move to f6 instead of f7, White Bishop can move to e5 to deliver double check and that is the end of it. So the moves are clear:


1. Rxg7+     Kxg7
2. Rg1+       Kf7
3. Qh5+       Kf6
4. Qg6#

In the actual game played between Lasker and Teichmann at St. Petersburg in 1909, Teichmann resigned after White’s Rxg7+ as he could see what was coming.