Tag Archives: chess tips

Chess Tactics: Attacking castled King with the classic Bishop sacrifice Part 3

Filed under Attacking tactics, Chess Strategy, Chess tactics, Featured Chess Tips
Tagged as , , , , , , , , , , , ,

Before learning more about the nitty-gritty aspects of this classic bishop sacrifice, let us explore one more game in the same category in a more systematic way for better understanding of this idea of attacking the castled king with bishop.

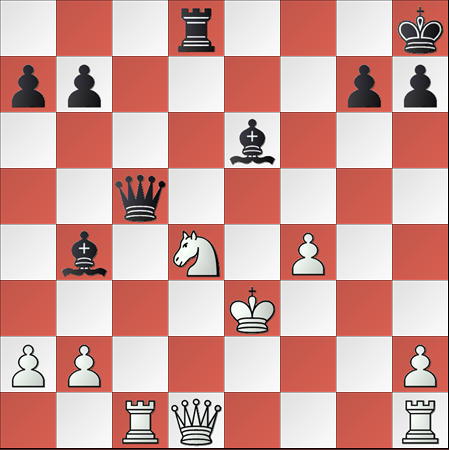
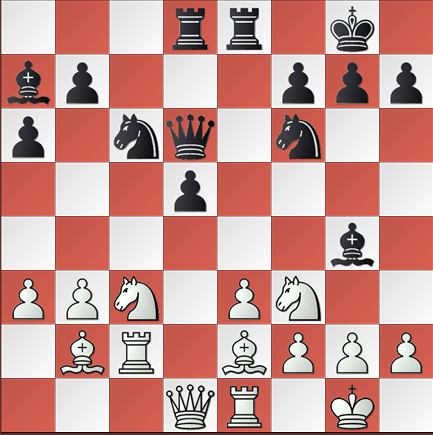
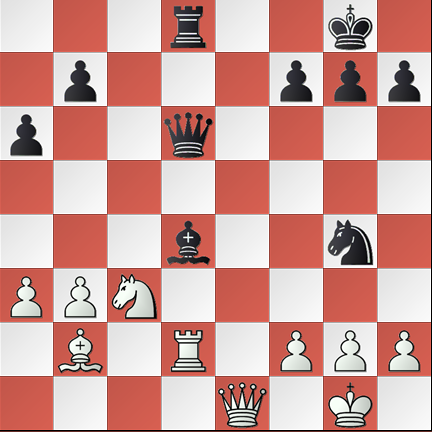
The position of the game is given hereunder:

agame

(White to move)

It is the turn of White to move and he launches the attack straightaway.

1. Bxh7+ Kxh7
2. Ng5+ ….

 
As stated earlier, let us analyze the game in a systematic way and try to explore all possible variations at the disposal of the black King and White’s response to those moves.

A cursory look at the position reveals that the black king has three options, in fact four options, at his disposal.

Black King can move either of the following four squares – g8, h8, g6 and h6.

Moving to h8 might not yield any result as the White can place his queen at h5 and threaten with check. Black king has no other option but to move to g8 and Queen’s next move to h7 is mate. So, this option is ruled out, in the first instance.

Let us look at the other three options.

Variation #1 – moving the king to g8:

The moves in this variation would be as follows:

2. …. Kg8
3. Qh5 Re8
4. Qxf7 Kh8
5. Qh5+ Kg8
6. Qh7+ Kf8
7. Qh8+ Ke7
8. Qxg7# 1 – 0

 
In this variation, White has used the pawns at h7, f7 and g7 as the primary points and relentless less pressure on the Black king with a series of checks ensures victory for the White, at the cost of the bishop sacrifice at h7.

Variation #2 – moving the king to h6:

The moves in this variation would be as follows:

2. …. Kh6
3. Qg4 Rh8
4. Nxe6+ Kh7
5. Qxg7# 1 – 0

 
Here white might also consider using the discovered check in the third move itself instead of Qg4 and capture the black queen, while ensuring that victory is assured.

Variation #3 – moving the king to g6:

This is one variation where black has some sort of chance to extend the game and force any mistakes from white.

2. …. Kg6
3. h4 Rh8
4. h5+ Rxh5
5. Qd3+ f5
6. exf6+ Kxf6
7. Qf3+ Ke7
8. Qf7+ Kd6
9. Qxh5 …. White can win from this position

 
Now, we have explored the game in its entirety with all the possible variations, and can conclude that this classic bishop sacrifice would be worth considering for attacking the castled king.

However, one needs to exercise great caution as any wrong calculation or non-satisfaction of any condition might jeopardize the entire plan and would backfire abruptly.

Before considering this option, one should question himself whether the sacrifice of the light squared bishop at h7 is feasible or whether it would yield the desired outcome. The answer for this question lies in the satisfaction of certain specific conditions, both from the perspective of the location of white pieces as well as black pieces. If there is any deviation in this basic position that need to be fulfilled, there is no guarantee that the sacrifice would yield the desired results. In Part 4 of classical bishop sacrifice we will look at things to consider before going for the bishop sacrifice.
Continue reading Part 4 of Classical Bishop Sacrifice

Chess tactics : Importance of controlling the d4 square in middle game

Filed under Chess Strategy
Tagged as , , , , , , ,

In the game of chess, the middle game plays a very important role. It is in this stage that the fate of the game is effectively decided and involves a series of tactics and strategies to attack and counter attack the opponent. A good opening paves for an intriguing contest in the middle game. Many chess players, in their early days of playing chess, ignore the pawns or do not realize the importance of pawns and sacrifice their pawns very cheaply. If one were to improve the skills and graduate himself to higher levels such as International Master or Grand Master in Chess, then he or she should have all-round skills – both positional skills and tactical skills – and should be in a position to evaluate each and every position according to its due merit and capability.

One of the major aspects in an opening is to have a fair control over the center board – any one or all of the four squares in the center – d4, d5, e4 and e5.

It is quite possible that as a result of a kind of opening you might be following, you might end up with an isolated queen pawn while playing black pieces. Isolated Queen Pawn refers to the queen pawn of black located at d5 square with no points in either files to support it. Having such a position might turn out to be very advantageous in some cases and at the same time might also turn out to be a hindrance. But effective tactics can help you reap the benefits of that isolated queen pawn in d5, and also pave way for controlling the all-important d4 square in the board. It is needless to say that one who has effective control over the d4 square can exert more pressure on the white pieces and ensure that with reasonable tactical skills aspire for victory over the opponent.

Let us try to understand the importance of controlling the d4 square with the help of this game played between two grandmasters.

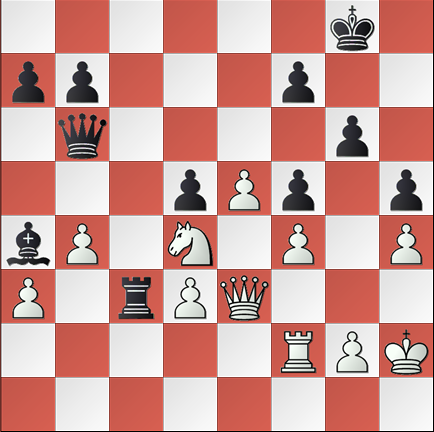
This is the position after 15 moves. It is the turn of white to move now.

chessgraph

(White to move)

The black pawn at d5 is the Isolated Queen Pawn, as it has no pawns in the “c” file and the “e” file. Black pieces are fairly developed and the key d4 square is in the control of the black. Though white’s knight at f3 and pawn at e3 also attack the d4 square, they are pinned by the black light squared bishop at g4 and the rook at e8 respectively.

Realizing the importance of the d4 square, white tried to win back the control, but his attempts proved futile by the smart play of black.

The game continued as follows :

16. Rd2 …. White tried to wrest control over the d4 square. However, some very interesting attacking play by Black nullified the efforts and black takes control over the game as can be seen below
16. …. d4
17. Nxd4 Nxd4
18. exd4 Bxd4
19. Bxg4 Rxe1+
20. Qxe1 Nxg4

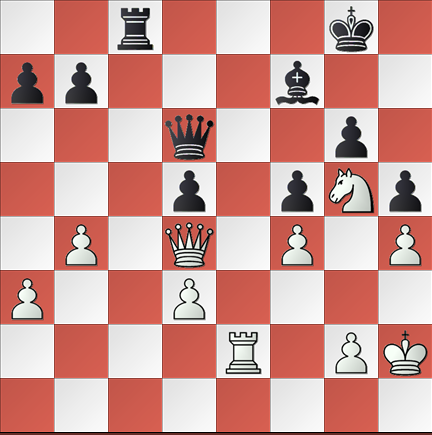
The position after 20 moves is given below:

chessgraph2

(White to move)

As you can see, black has not only wrested control over the vital d4 square, but its pieces have pierced into White’s territory and are very interesting positioned to go for all out attack.

The game proceeded further as detailed below, but the result was never in doubt and it is black which having effective control over the vital d4 square is likely to emerge victorious barring any foolish mistakes on his part.

21. Ne4 Qxh2+
22. Kf1 Qh1+
23. Ke2 Qxg2
24. Kd1 Qf3+
25. Qe2 Qh1+
26. Qe1 Qf3+
27. Qe2 Qxb3+
28. Ke1 Ne5
29. Ng5 Bc3

0 – 1

This is an interesting game underlining the importance of having control over the d4 square, the opportunity for the same being provided by the Isolated Queen Pawn.

Middle game tactics: Identifying your weakest piece is essential

Filed under Chess Strategy
Tagged as , , , , , , ,

In the game of chess, the most interesting and intriguing part is the middle game, in which both the players vie for positional control and shrewd tactics to gain an upper hand over the opponent. Typically, it is that part of the game where all the major and minor pieces are in the process of being deployed and or stationed in interesting squares as part of the attack and / or defense. The middle game also gains importance in that it is the stage where utmost calculation and concentration is required, and any wrong move or not a correct move might lead to losing control or giving an edge to the opponent.

In such cases, it might quite often happen that you might be caught in a dilemma as to which piece to move or how to go forward in the execution of tactics. This is possible, especially when most of your pieces are in favorable positions and having a tight leash on the opponent’s pieces while at the same time safeguarding your King and other pieces. It is in such times that the technique or trick of identifying your weakest piece among the active pieces comes to your assistance.

Let us try to explore this simple concept of identifying the weakest piece with the help of an interesting game played between two grandmasters in a European team Championship during 1999.

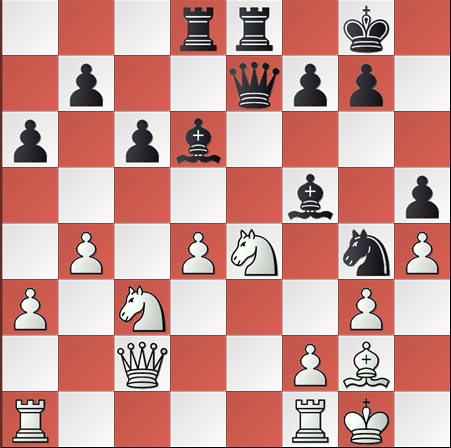
The position of the board after 20 moves by White is given below. It is the turn of black to move.

chess_image1

(Black to move)

A cursory look at the position of black’s pieces reveal that its major and minor pieces are fairly developed and exerting pressure on White. Also, there is not much scope for the black pawns to make any move that might turn out to be advantageous. He is presently caught in a dilemma as how to go forward with his next move. What is the option available to him now.

A second look of the major and minor pieces is warranted before any meaningful outcome regarding his next move. The light-squared bishop is acting as a pin for the White queen and making White’s Knight immovable without the White queen being moved to safety. The black knight at g4, having effective control over the f6 and h6 squares is taking care of the safety of the kingside. The two rooks are fairly centralized and the rook at e8 is providing additional support to the Queen at e7. This analysis reveals that the dark-squared black bishop is the one that can be considered for the next move. Zeroing on the dark-squared bishop also reveals that, but for its occupation of the d6 square, the rook at d8 might have captured the white pawn on d4. A critical analysis of this type will provide instant clues to make the most effective move. Also, the white king at g1 provides the clue that the diagonal a7-g1 might be explored for the dark-squared bishop, if he switches the angle. Black did the same and the game followed as follows:

20. ,,,, Bb8
21. Rad1 Ba7 White tried to protect the d4 pawn with additional support, but the damage had already been done and White might have to lose his pawn in d file.
22. d5 …. His futile attempt to protect his pawn in d file was thwarted.
22. …. cxd5
23. Nxd5 Rxd5
24. Rxd5 Bxe4
25. Bxe4 Qxe4
26. Qxe4 Rxe4
27. Rd8+ Kh7
28. Rd7 Re2

White’s desperate attempts to salvage his pawn in d file or counterattack the Black king in anticipation o any mistake from Black proved futile, and Black, having deployed the idea of identifying the weakest link in an attack, emerged winner in this game.

This game highlights the fact that in addition to execution of shrewd tactics, one needs to be aware of the positional strengths and weaknesses of every piece in the board and make the optimal move at the appropriate time to gain control over the board and the opponent.

Middle game tactics: Bad French bishop is not always bad

Filed under Chess Strategy
Tagged as , , , , ,

In last two Bad Bishop articles (how to deal with bad bishop and bad French bishop and its consequences) we talked about how the bad bishop can lead to a disaster in this article we will look at other side of the Bad Bishop.

One of the trick situations one quite frequently encounters in a middle game is that of a bad French bishop arising in the opening stage of the game in which the light squared bishop of black is invariably blocked by its pawns at e6 and d5, shunning the possibility of prospective development for that light squared black bishop.

The typical French defense opening is the cause for such a development and it is this reason that many of the exponents of French defense that black’s light squared bishop be sacrificed in the early part of the game, thus paving way for a competitive middle game between the two players.

The bad French bishop is not always bad as it is perceived to be, and if right tactics are employed, black’s light squared bishop can be very handy and turn out to be the good bishop. In this game, played between two grandmasters in the early 1990s, one can find and appreciate how the bad French bishop has been converted into a good one leading to the victory of black over white.

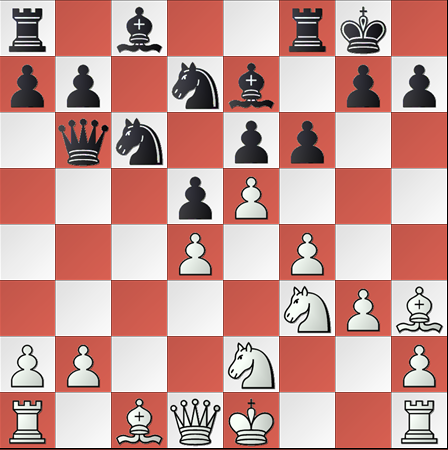
Given below is the position of the game after 11 moves and it is the turn of white to make the move.

graphic1

A cursory look at the position indicates that black’s light squared bishop is rooted to its original square at c8 blocked by pawn at b7 and Knight at d7. But, black can make the bad bishop active if it is prepared to sacrifice a couple of pawns if required. Black did precisely the same after the opportunity presented itself.

12. Bxe4 Kh8
13. Bxd5 fxe5 The opportunity presented itself with a chance to open up the two black bishops
14. fxe5

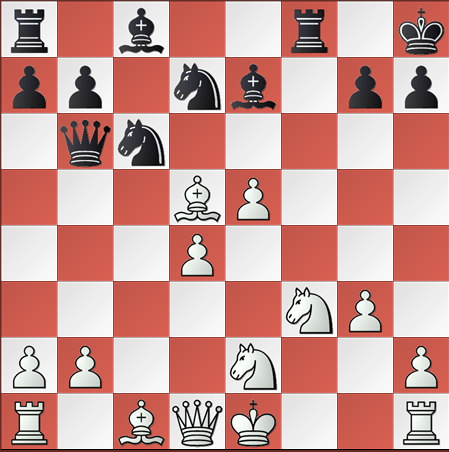
The position after the 14th move of white is presented below for an assessment:

graphic2

Black effectively seizes the opportunity and surprises White with a couple of sacrifices in an attempt to gain control over the board.

14. Ncxe5
15. dxe5 Nxe5
16. Nf4 Bb4+
17. Kf1

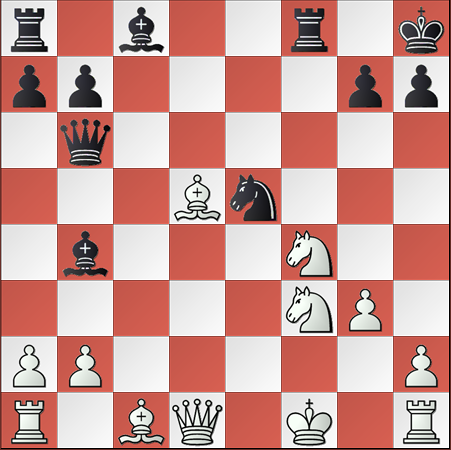
The position after White’s 17th move is given below:

graphic3

Black has successively cleared the way for the “bad” French bishop to finally come out and assist in the attack. The smart play by Black ensured that the “bad” bishop gets transformed ultimately into a “good” one, and spearheaded the attack on White king, as follows:

17. Rxf4
18. gxf4 Bh3+ French bishop comes out with a bang
19. Ke2 Ng4
20. Nd4 Qc5
21. Be6 Rd8
22. Be3 Nxe3
23. Kxe3 Bxe6
24. Rc1

The position after white’s 24th move is given below:

graphic4

Black has virtually taken control over the game with the assistance of the two bishops, especially the otherwise “bad” French bishop.

24. Rxd4
25. Qxd4 Bd2+
26. 0 – 1

It is curtains for White. The “bad” French bishop need not always be bad. Effective tactics is bound to make this bad bishop a very good one. This game also vindicates the fact that the famous French defense is in fact a very competitive opening worth exploring.

Middle game tactics: How to deal with the bad French bishop

Filed under Chess Strategy
Tagged as , , , , ,

The most important part in the game of chess is the middle game (we saw that in Consequences of Bad Bishop), where both the players, having developed their pieces reasonably well, initiate a series of attacks, counter-attacks, checks, and sacrifices in an effort to gain control over the opponent. The quality of the middle game and the nature of the strategy adopted by the players during this phase of the game are primarily determined based on the positions of the pieces and the kind of development one does take in the opening part.

The nature of the opening game and the favorable positioning of the major and minor pieces determine the tempo for the middle game. We have discussed at length about the Isolated Queen Pawn. Similarly, we might be confronted with an issue of bad French bishop.

What is bad French Bishop? Black’s light squared black bishop is often given this name. In some types of opening games, as part of the development of the pieces in accordance with the classical opening principles, the player playing black might have to move his king pawn at e7 one square ahead to e6 and the queen pawn two squares ahead to d5. These moves, made out of necessity to develop the minor pieces, might appear good in the first instance. However, a second look might reveal that the pawn placed at e6 and/or at d5 might effectively block the diagonal c8-h3 and the diagonal a8-h1, seriously hampering the movement of the light squared black bishop starting from the c8 square. Literally, the movement of the light squared bishop is blocked by its own pieces and sometimes, this immobility of the black light squared bishop might lead to inadequate development, and ultimately present an advantage to the opponent. This situation is referred to as black’s bad French bishop. The name “French” is added to the bishop as this situation typically arises in a French opening.

Let us try to understand this aspect and assess how this bad French bishop plays the spoilsport for the black’s pieces through the review of a game played between two grandmasters

Given below is the position after 25 moves, and it is the turn of white to make the move now.

article21

A cursory look at the position indicates that, among the minor pieces, White has sacrificed both of its bishops and retained one Knight, as against one light squared bishop for black. White’s Knight occupies the important d4 square, and the game is evenly poised.

The game proceeded along the following lines:

26. e6 White decides to open up the position
26. fxe6
27. Qe5 White plans to target f6 square for Queen
27. Rc7 Not a good response from black. It would have been better had he played Qc7 instead of Rc7
28. Qf6 Be8
29. Nxe6 Qd6
30. Re2 Qe7
31. Qb2 This is a smart move by White offering to sacrifice his h4 pawn Black has other ideas and prefers to go with them
31. Rc8
32. Ng5 Qd6
33. Qd4 Bf7 The last move by Black is a blunder, literally gifting the game to white, courtesy Black light squared Bishop

This is the position on the board, which clearly shows the blunder of black’s French bishop, leading to the victory for White.

article3

34. Qh8+ 1 – 0

This is an example in which the light squared bishop, devoid of development in the initial stages, has proved to be more of a burden leading to the downfall than of any constructive support in the attack.

It is for this very reason that in most of the variations of the famous French opening, an early sacrifice of black’s light-squared bishop is suggested.