Tag Archives: chess positions

The World’s Most Nearly Impossible Chess Puzzles

Filed under General Chess
Tagged as , , , , , , , , , , ,

1st Puzzle

puzzle1
This puzzle was devised by Dr. Karl Fabel and published in 1949 in “T.R.D.’s Diamond Jubilee” issue of the Fairy Chess Review.

WHITE TO PLAY AND MATE IN SIXTY.

Fen Position

For those of you who are interested in analyzing the position with their favorite chess program here is the FEN Position, you can simply copy it and paste it in Chessbase or you could simple save it in a .Fen file and load it as FEN.

8/4K3/4NN2/p3p3/rnp1p3/1pk5/bp1n4/qrb1N3 w – – 0 1

2nd Puzzle

puzzle2
This chess puzzle by C. S. Kipping was published in the Manchester City News in 1911.

WHITE TO PLAY AND MATE IN THREE.

Fen Position

Compared to the last one this is pretty easy but rather baffling how White goes on with the next few moves, by the way this puzzle is for fun.

k7/8/N1N5/3B4/K7/8/4p1r1/8 w – – 0 1

3rd Puzzle

puzzle3
This puzzle was composed by Hans August and Dr. Karl Fabel, and was published in 1949 in Romana de Sah.

WHITE HAS JUST MADE HIS SEVENTEENTH MOVE. WHAT WAS BLACK’S NINTH MOVE, AND WHAT WERE THE MOVES THAT FOLLOWED IT?

Fen Position

Although you will not need the FEN for this one, I will post it just in case you want to try out something ODD.

2bqkb2/1pppppp1/8/8/N5P1/p3QPR1/PPP1PKPN/R1BQ1B1b b – – 0 1

4th Puzzle

puzzle4

This puzzle is based on a theme by W. A. Shinkman, and the mate-in-three was first solved by Sam Loyd. The puzzle above was published in the Leeds Mercury Supplement in 1895.

WHITE TO PLAY AND MATE IN THREE.

Fen Position

Another easy one but I know there are some who would like to get their engines started and see if the engine can solve but the best way to solve these puzzles is to think and take time, that is how you will enjoy it the most.

8/8/8/8/7k/8/PPPPPPPP/RNBQKBNR w KQ – 0 1

5th Puzzle

puzzle4

Similar to the 4th puzzle but this time the question changes a little bit.

WHITE TO PLAY AND MATE IN THREE. CONSTRUCT A GAME THAT WILL LEAVE THE POSITION SHOWN ABOVE AFTER BLACK’S SIXTEENTH MOVE.

Fen Position

8/8/8/8/7k/8/PPPPPPPP/RNBQKBNR w KQ – 0 1

There you go, 5 brainteasers to work on your chess skills. Now to the answers, I will not post it until next few weeks, I will let everyone give these a try and leave their answers in the comment section. This will also start a good conversation. There are thousands of visitors every day at MyChessBlog it would be great if visitors leave comment that will give me some motivation to write more posts as well. It looks sad that not many of my posts get comments after 1000-2000 views.

Get your thinking caps on and start solving the puzzles. I highly recommend you solve the Mating problems by yourself before going for the Chess Program.

The coming battle for the Chess crown

Filed under Chess tactics, General Chess
Tagged as , ,

In order to take a look at the shape of things to come in the future world of chess, we necessarily had to come close to the present first. The most important event coming in near future is the World Chess Championship match, planned to be held in April 2010 and the bidding process for selection of venue will end on September 30 of this year. Everybody by this time knows that Veseline Topalov of Bulgaria will be challenging the reigning champion Viswanathan Anand of India to determine the World Champion in 2010, after which such matches will be held at two year intervals.

But before I took up my telescope again to take wistful looks at what I consider as the romantic periods of chess, I was wondering where to focus attention in this present era. Then I got the idea: what better than to look at recent games between the defender and challenger to the title.

To dissuade people from making own different interpretations of what I am going to present, I want to make clear my criteria for selection of the two games played between these two players. I wanted both games from recent periods (2007-2008), both players getting to win while playing as White, and both games to be of comparable length but fairly short (within 30 moves) to keep our article size within limit! That automatically limited my choice and in fact I could get only two that met all the criteria, so no one can blame me for a biased selection!

The first game was played at Leon in 2007 with Anand on the White side winning in 29 moves and the second one was at Bilbao in 2008 with Topalov as White winning in 25 moves. We would like to assure readers that because the way the games were chosen, they cannot purport to represent the actual playing ability of the players. The readers are free to draw their own conclusions.

You have of course seen example of Vishy’s play in The stomach is an essential part of the Chess master and the fighting spirit of Topalov in Attacking Chess Tactics: Hounding the enemy King which produced one of the great games of chess in spite of his losing it to Kasparov.

Though neither player needs any introduction, we want to keep up the practice of presenting the actors before showing their acts. Anand has already been introduced in The stomach is an essential part of the Chess master, so we need not do it again.

Veselin Topalov (b.1975) was born in Bulgaria and became the World under-14 champion in 1989 and a GM in 1992. Along with Kasparov, Kramnik and Anand, he has also crossed the FIDE Elo rating of 2800, the only four players ever to do so. Though living in Spain, he represents Bulgaria in Chess Olympiads.

The diagram shows the position in Anand-Topalov game after 24 moves.

anand-topalov game

25. b6 Ra5 White was threatening 26. Bb5+ to capture the rook
 
26. Rd1 Bg5 It is right strategy for Black to try to exchange White’s Bishop of the same color as the promotion square b8 for White’s NP
 
27. b7 Ke7 Black had to attend to the immediate threat posed by White before he could implement his strategy!
 
28. Bb6 Re5 Threatening the Rook was just a gain in tempo but White’s aim went deeper than that!
 
29. Bd8+! Resigns The best Black could do was 29. … Rxd8 (best) 30. Rxd8 Kxd8 31. b8=Q+ Kd7 32. Qxe5 with an easy win for White

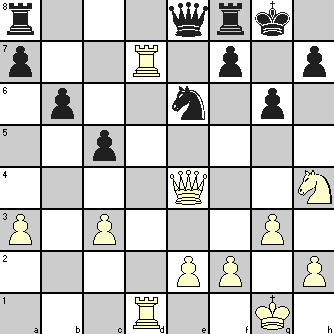
The Topalov-Anand game after 21 moves stood as under:

topalov-anand game

22. Nf3 c4
23. Qh4 Nc5
24. Re7 Rd8 In the given situation 25. Rxe8 Rxd1+ 26. Kg2 Rxe8 getting two Rooks for the Queen must have been acceptable to Black (and so, White would not give him that benefit!)
 
25. Rf1 Resigns The likely continuation could be 25. … Qc6 26. Ng5 h5 27. Nxf7 Rxf7 28. Rxf7 Kxf7 29. Qxd8 giving White one extra passed pawn and a Rook against Knight, which should be enough for him to win.

Watch first Game – Anand Won

httpv://www.youtube.com/watch?v=G4bbukLvhcs

Watch second Game – Topalov Won

httpv://www.youtube.com/watch?v=AYPmBOQN5tw

Middle game tactics: Moving the worst piece first is a good idea

Filed under Chess Strategy
Tagged as , , , , , , ,

The Middle game part in the game of chess is the place where most of the tactics are tried and effectively deployed. This is so because, it is in this stage that the major and minor pieces of both the players would be battling for control over the squares. As you might be aware, tactics are a series of less than three moves at a stretch aimed at a positional advantage and/or thwarting the plans of the opponent. In most of the cases, the tactical moves planned by a player might not fully materialize due to the defensive moves or counter attacking moves of the opponent. So, there would be a series of tactics that might be required to be calculated and assessed by the player before effectively deploying it into action.

It is quite possible in such occasions that one gets caught in a dilemma as to which piece to move or how to initiate a tactical ploy to gain advantage over the opponent. It is in this context that assessing the strengths and weaknesses of the major and minor pieces at work in the board should be assessed, and the least effective piece in the board should be considered as the starting point of a tactical ploy. The process of identifying the weak piece is not a one-time affair in the game. The positions keep changing quite frequently and it is essential that the idea of identifying the relative weakness in the pieces is constantly reviewed and tactics are planned accordingly so that one can have an edge over the opponent.

Let us try to explore this concept a little deeper with the help of a game played in 1995 between two grandmasters, and see how the concept works out.

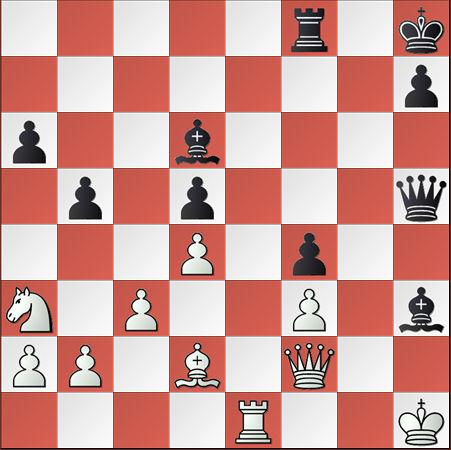
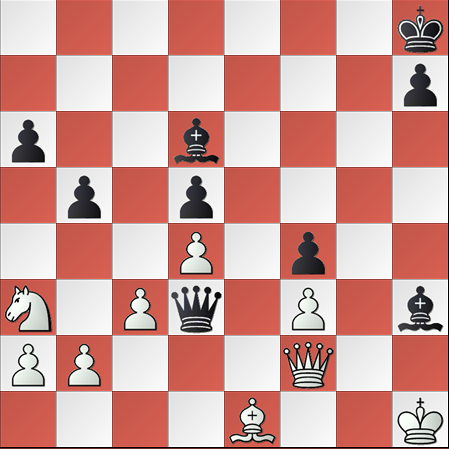
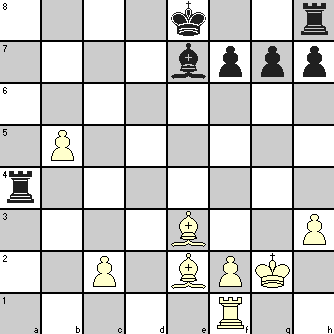
The position of the game after 26 moves by White is given hereunder, and it is the turn of Black to make a move.

pict1

A casual look at the board reveals that the Black has two bishops as against one of White. White, however, has an additional Knight and also one extra pawn. Despite a pawn down, black has a good position on the board, and a fair chance for launching the attack. The light squared bishop is threatening the white knight at a3, and at the same time providing cover for the pawn at f3. Now the dilemma is which is the piece to be moved. It is evident that the rook at f8 is not so effective, and there is not much room for moving any of the pawns.

The game continued as follows with the black preferring to move his weak rook at f8.

26. …. Rg8
27. Rg1 …. Sensing the ploy that blacks light squared bishop might threaten the white king with a check on g2, the rock has been moved for additional cover.
27. …. Rxg1
28. Kxg1 …. Black preferred to exchange his rook

The position in the board after White’s 28th move is given below:

pict2

As has been stated earlier, it is not necessary that the idea of identifying the worst piece should be a one-time affair. It has to be looked for constantly to have better control over the overall board and also an edge over the opponent. Now, we need to once again identify the weak piece or the piece that can be ideally considered for the next move. The light-squared bishop is exerting pressure on the White King restricting his move to only two of the four possible moves, and the dark-squared bishop is protecting the pawn at f3. It is obvious that the queen should be the one to be moved.

A deep look at the squares reveals that the white square d3 is unprotected. This would be better for the black queen to land in to exert more pressure on the white king. Black decides to execute the plan as follows:

28. …. Qg6+
29. Kh1 Qd3 Mission completed for black
30. Be1 …. White tries to activate his Knight at a3 to c2.

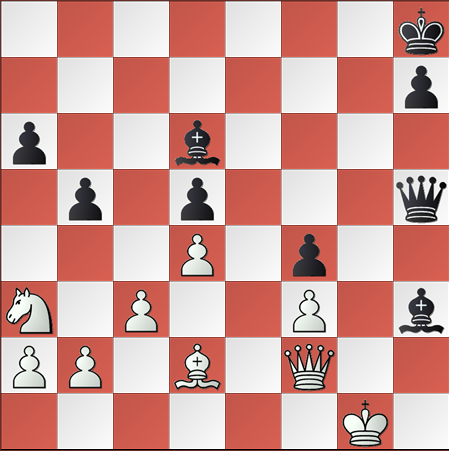
The position after 30 moves of white is given below:

pict3

It is the turn of Black to move now. What should he move now? Again the process of identifying the weak piece or ineffective piece needs to be carried out.

It is clear that after White moved his dark-squared bishop from d2 to e1, the threat for the black pawn at f3 is eliminated, and there is no need for the dark-squared bishop at d6 to provide cover for the f3 pawn. As such, the weak piece or ineffective piece now turns out to be the dark-squared bishop.

30. …. Be7
31. Nc2 Bh4
32. Nb4 Qd1

The game is almost over for White. The decision to move the dark-squared bishop from d6 to e7 and then follow it with a move to h4 (Bh4) is too good for white to handle, and as such lost the initiative. The end game is more of a formality now, with black firmly in control.

Analysis of the positions and the relative strengths and weaknesses should precede any tactical ploys, and this game is a best example for this useful trick, which might turn out to be so handy in the middle game.

Do not panic – Tactics are present even if they are not visible – Part 3

Filed under Chess tactics
Tagged as , , , , , , , ,

Continuing from Do not panic – Tactics are present even if they are not visible – Part 2

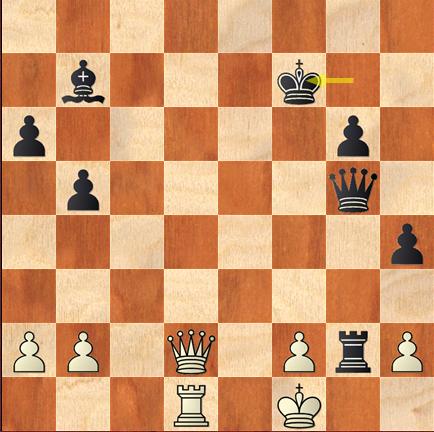
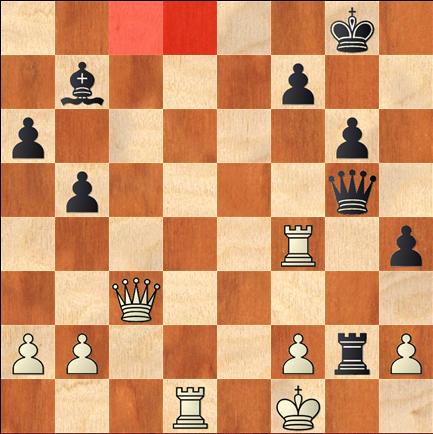
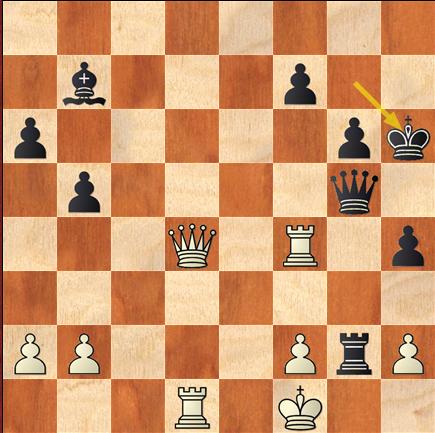
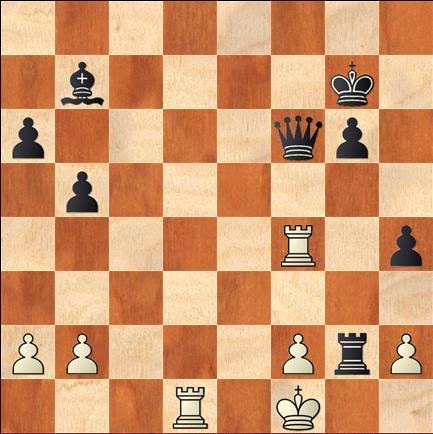
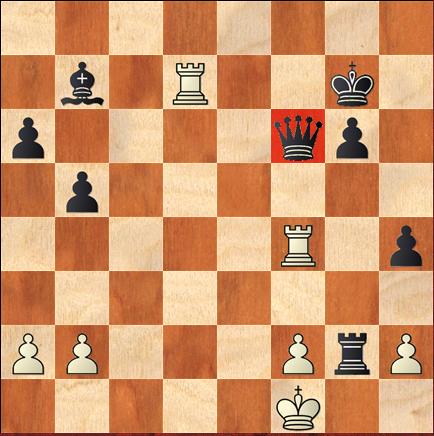
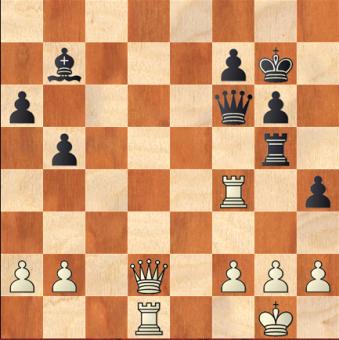
Now the position after 31 moves is as follows :
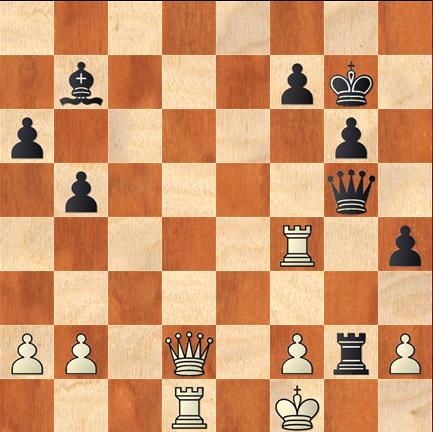
tactics_chess

White to Move

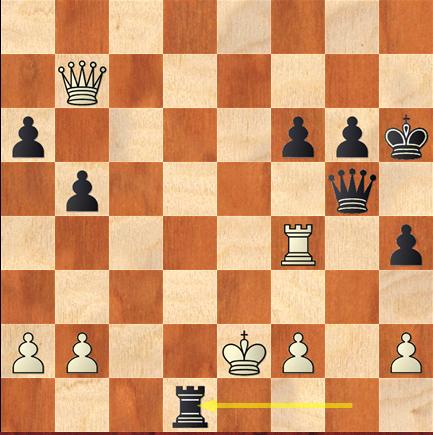
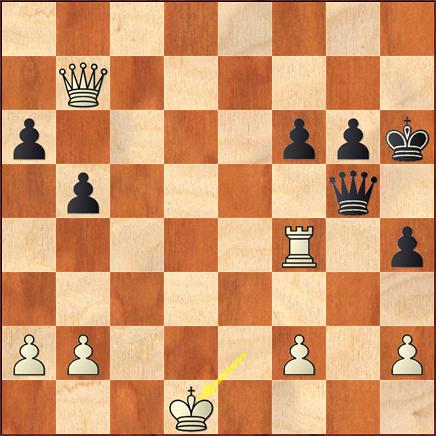
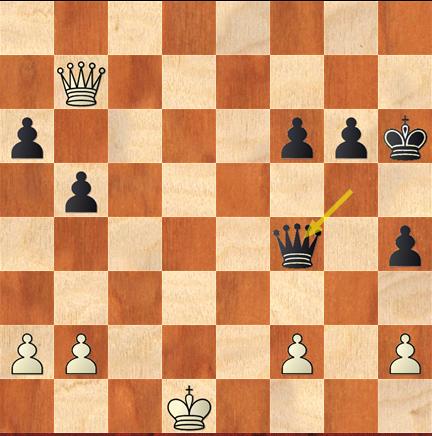
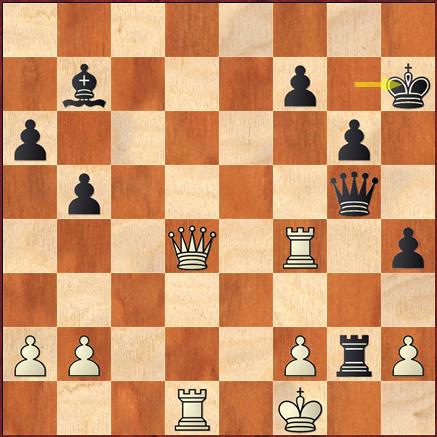
Now, it is the turn of White to move. Black has initiated the attack and is in the mood of exchanging pieces and launch an all-out attack on White King. As has been reiterated in our series of articles on tactics, assessing the vulnerability of opponent attack and exploring the possibility of checks and captures gain prominence in an attack or counter attack.

We have already seen that the black King at g7 is vulnerable. The next option would be to explore the possibilities for checks. What are the options available for White to threaten the Black King with check?

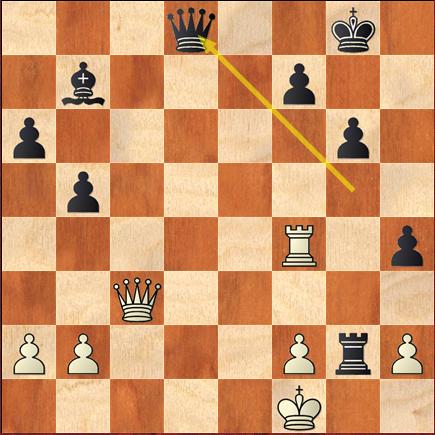
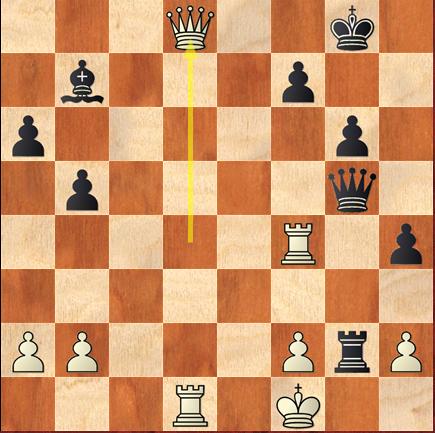
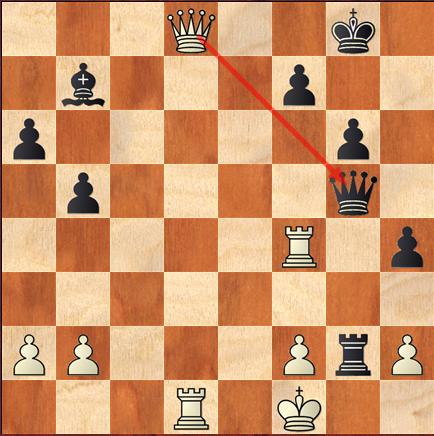
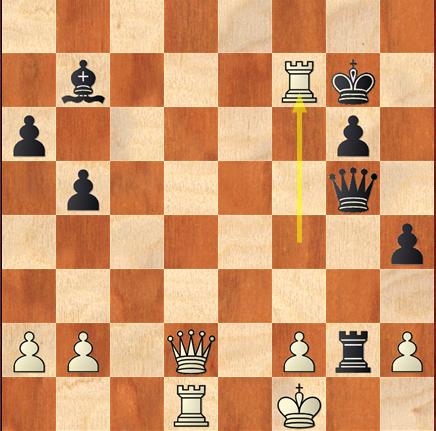
Option #1

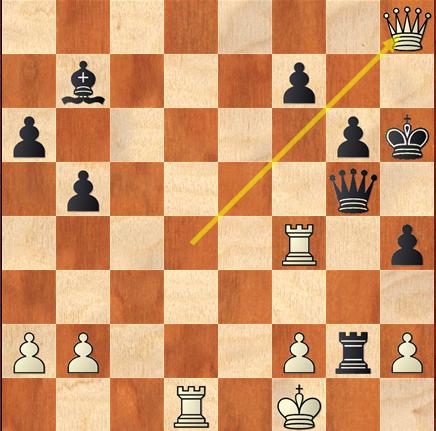
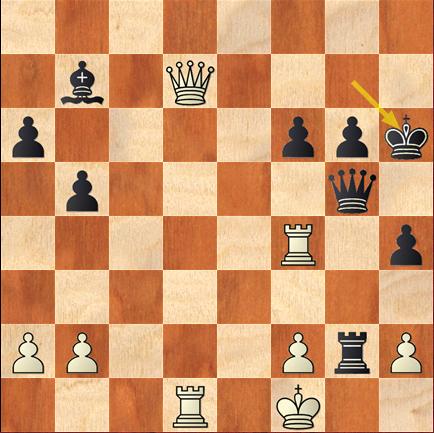
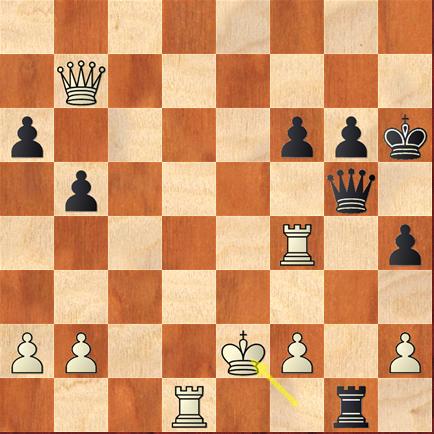
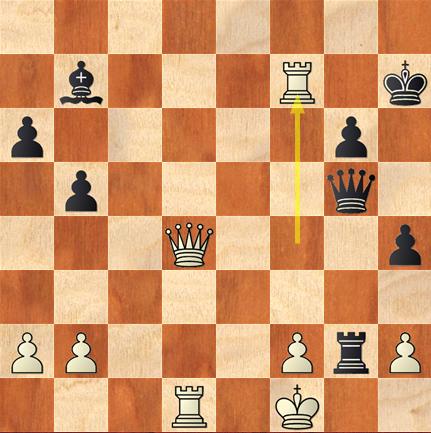
White can threaten the Black King with check by moving the rook at f4 to f7. The Black King will capture the rook. Then, the Queen at d2 can be moved to d7 to threaten the Black King. In response, the Black might move its Queen at g5 to f7.

a.Rf7+ Kxf7
b.Qd7+ Qf7
chesstactical1

chesstactical2

chesstactical3

chesstactical4

No more options are there for the White to continue exert pressure by threatening the Black King with checks. So, the option#1 does seem to be promising enough.

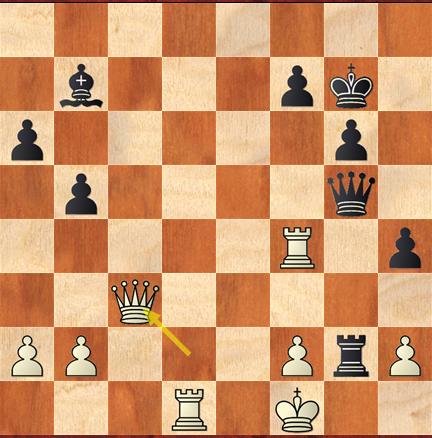
Option #2

We have already seen that the diagonal a1 to h8 can be exploited for threatening the Black King placed at g7.

a.Qc3+ Kf8
tactpos1

tactpos2

tactpos3

The Black Queen at d2 might be moved to c3 to threaten the Black King with a check. In response, the black King might move to the back rank at g8. Surprisingly, you find that there are no more opportunities for check on Black King as the squares c8 or d8 from where the checks might become possible are covered by the Black bishop at b7 and the Queen at g5.

This option is also not much encouraging enough.

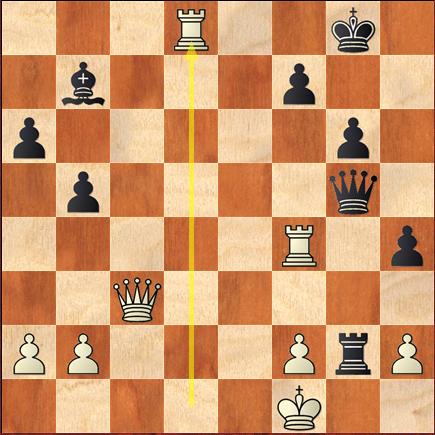
Option #3

One of the essential aspects of tactics in attacks or counter-attacks is to explore all possible options and foresee the possible response from the opponent. One should always look for the best possible alternative, which will open up new horizons and make it easier for adequate and strong response to the Black’s move.

Having explored two options, one should not lose heart or leave the advantage to the opponent and wait for his counter moves,

a.Rd8+ Qxd8
tactico1

tactico2

This option is also not very promising enough.

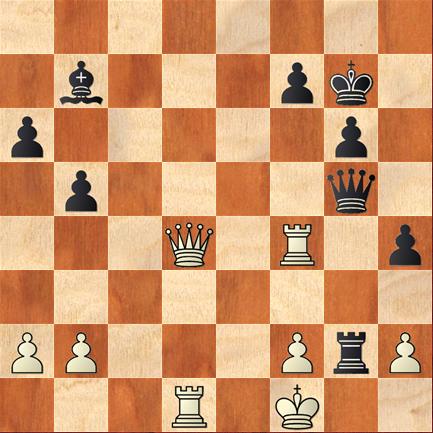
Option #4

What are the other possible options for threatening the Black King with check?

a.Qd4+ Kf8
b.Qd8+ QxQ
tacticalog1

tacticalog2

tacticalog3

This will result in exchange of queens and nothing concrete leading to checkmate will arise with this option.

What will happen if the Black King, instead of moving to the back rank, decides to move sideward to h7?

Option #4a

a.Qd4+ Kh7
b.Rf7+ (This seems to be promising as the King has no other
option but to move to h6 and then the Queen at d4
can move to h8 and say “checkmate”)

Option #4b

If, in response to Qd4+, the black King moves to h6, then, Qh8+ will be checkmate. As such the move by Queen from d2 to d4 seems to be very promising.
ta

ta2

ta3

ta4

Having evaluated all possible options, the White finally decides to go with the option#4 discussed above which seems to be more promising than other three options.

32. Qd4+ …..
32. …… f6 The best possible option for Black is to move the pawn as any
move might become vulnerable as we have seen in option#4

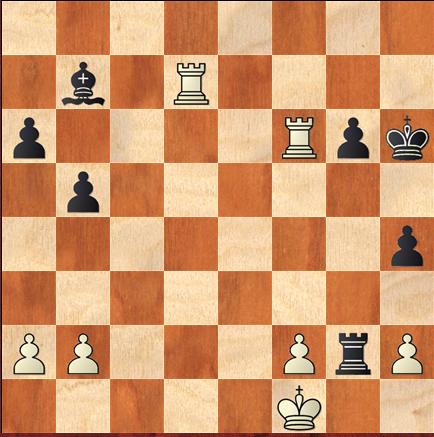
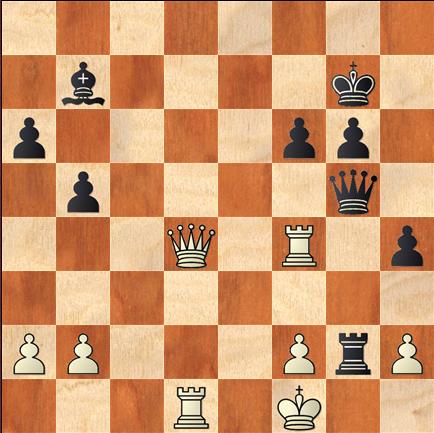
The position after move 32 will be as follows:
taaa4

White to Move

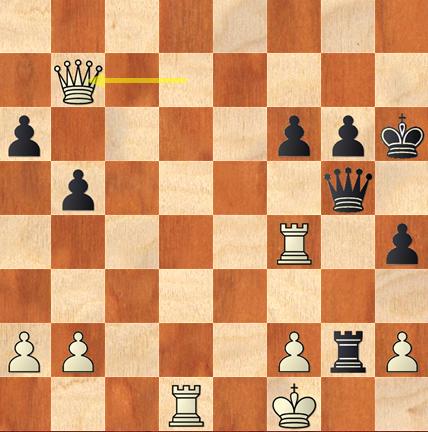
Contrary to White’s calculation that Black King, which is under threat, will be moved, the resilient black moved the pawn to defend its King and kept the King unchanged at g7. However, you might see that the 7th rank is opened up and the Black King is vulnerable for attack from the 7th rank. What would be the options for White to consider?

Option #1

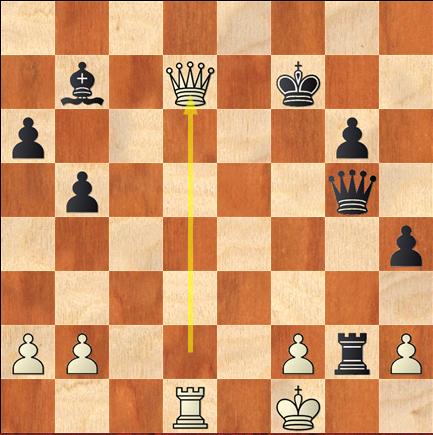
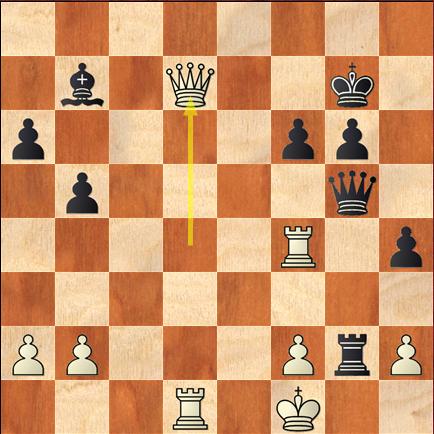
a.Qd7+ Kh6
koola1

koola2

b.Qxb2 ….. As there is no possibility for enforcing check on Black king
koola3

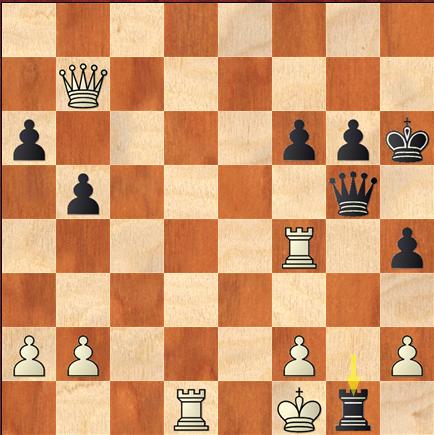
Now, it is the turn of Black to move, and having given some leeway in that there is no threat of check on its King, the Black might continue to begin its attack.

….. Rg1+
a.Ke2 Rxd1
b.Kxd1 QxR
11

21

3

4

5

Now, you see that after a series of exchanges, White’s position will become weaker in that the Black has one extra pawn. As such, this option is not feasible.

Option#2

What might be the other option that will ultimately lead to checkmate and does not allow any leeway for the black pieces to continue its attack.

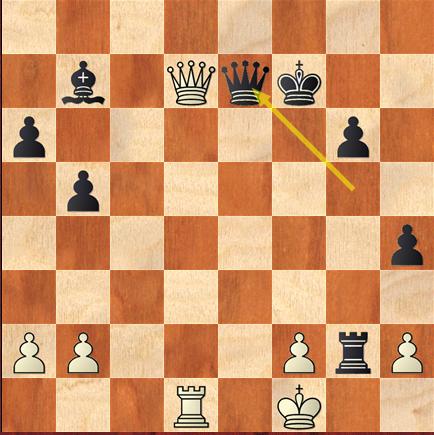
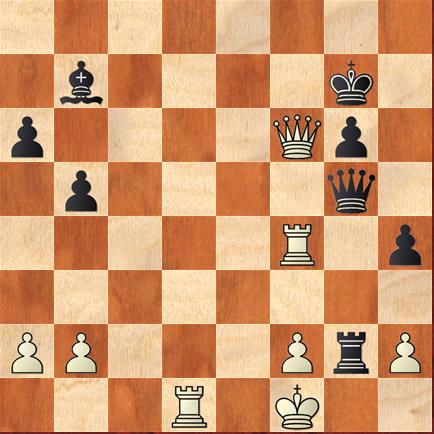
Again looking at the options for threatening the Black King with check, White might find that Qxf6+ will be an option, sacrificing the Queen in the process.

a.Qf6+ Qxf6
45

46

Despite losing the Queen, White turns out to be in an advantageous position. A check by moving rook at d1 to d7 will force the black King to move out of g7 and thus expose the Black Queen for capture by rook at f4. Sacrifices are also part of the tactics and have equal importance. The value of the piece is immaterial and it is the positional advantage that get first preference than the value of the pieces.

Having foreseen the various alternatives, White has decided to capture the pawn at f6 and threaten the Black King with check.

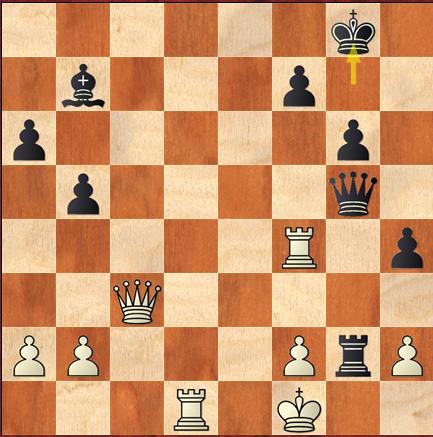
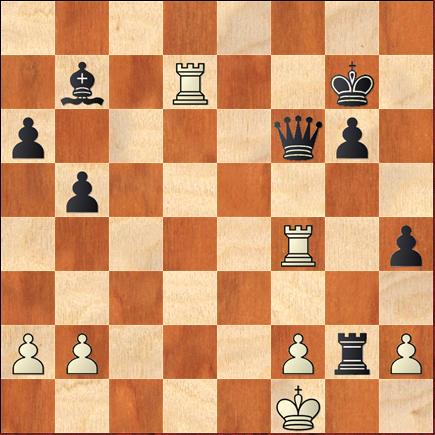
33. Qxf6+ Qxf6
34. Rd7+ Kh6
35. Rxf6 Black resigns
47

48

49

This is yet another example of how tactics can convert a literally losing position to a winning one.

The position of White King was precarious and Black was launching an all-out attack, probably out of desperation to win the game in the knock-out stage to remain in the contest. For White, a victory would be a passage for the next round.

Tactics, in this context, has been necessitated out of sporting behavior and the urge to move up in a knock out tournament.

This beautiful example will once again emphasize the importance of tactics. There is no reason for panic at any point of time. Counter attacks of these sort does require critical analysis of all possible alternatives. Not only should the counter attacks be strong and decisive, but it should also be timely and should not allow the opponent, who is launching an all-out attack, is allowed an opportunity to implement his attacking strategy.
Do not panic – Tactics are present even if they are not visible – Part 2

Filed under Chess tactics
Tagged as , , , , , , , ,

Continuing from Part 1 of Do not panic – Tactics are present even if they are not visible.
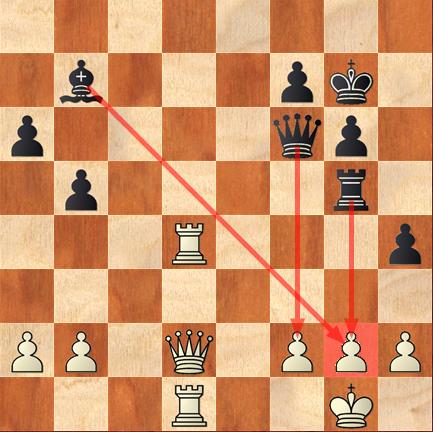
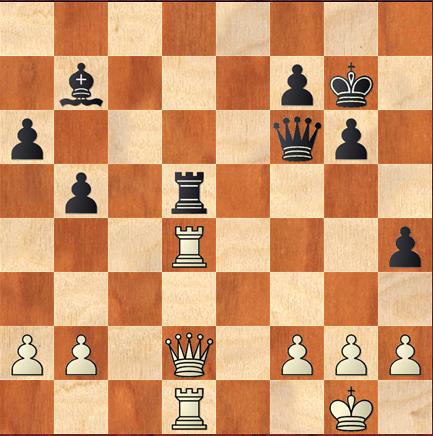
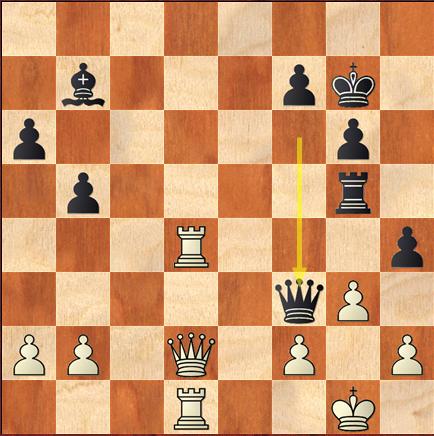
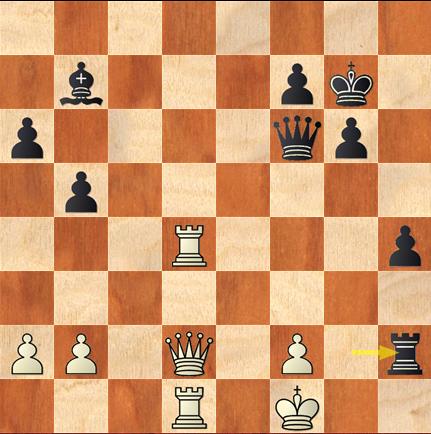
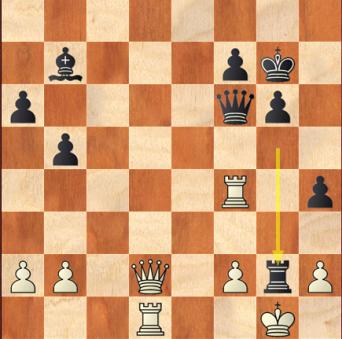
In response, the black moved the rook from d5 to g5.

29. Rd4 …..
29. ….. Rg5

Fig. 1

figurechess1
Fig. 2

figurechess2

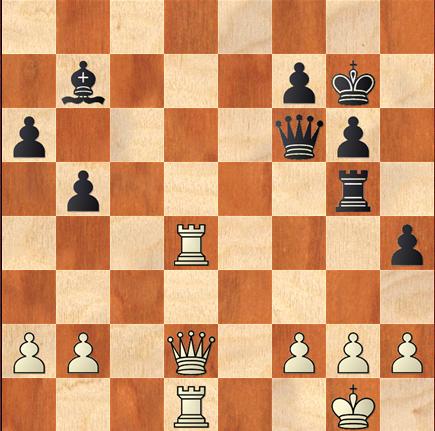
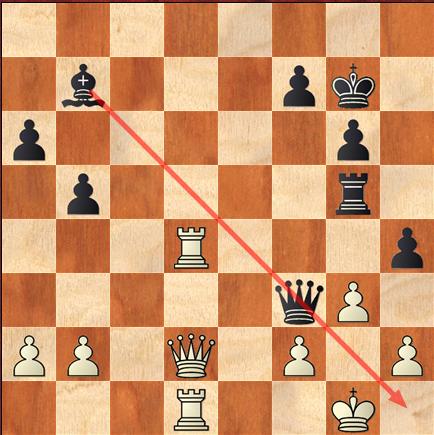
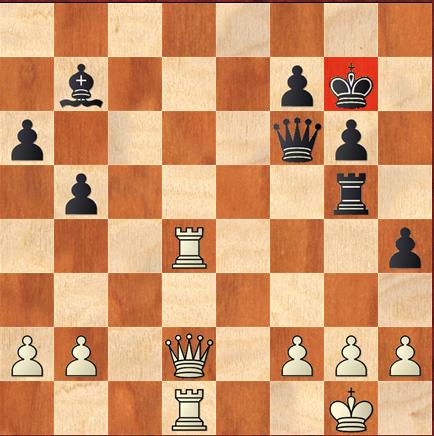
The move by White to safeguard his queen and rook, and the response by Black by moving the Black rook to g5 unveils the grand plan of Black to launch an attack on the White King.

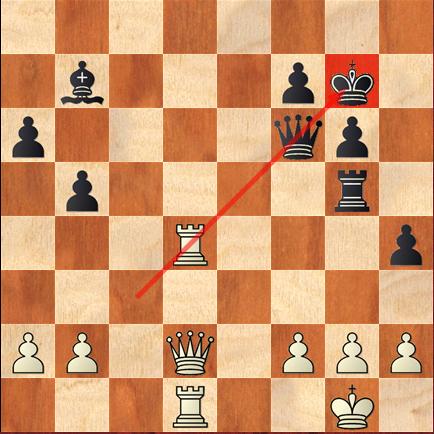
The white pawn at g2 is vulnerable and it is this pawn that is targeted by the Black in a double threat – one from the rook at g5 and then from the bishop in b2. The Queen at f6 is also exerting pressure on f2, as can be seen in the diagram given below.

Fig. 3

figurechess3

The Black has launched an attack on the White and it is the turn of White pieces to counter this attack by defending his pieces or exploring possibilities to counter attack the Black King.

One important point worth bearing in mind is not to get panic when faced with an attack by the opponent as is the situation in the present case. The situation calls for a careful analysis of the position and various alternatives that might be employed by White to thwart the attack.

It is very important that before deciding on a particular move, an analysis of the possible counter moves or consequences should be assessed.

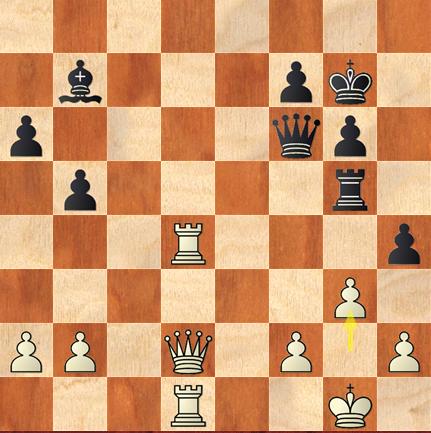
The White pawn at g2 is at threat. If white considers moving the pawn at g2 to g3, what might happen?

The black queen at f6 might be placed at f3 thus opening up the diagonal a8-h1 for checkmating the White King, placed precariously at g1.

Fig. 4

picschessta1
Fig. 5

picschessta2
Fig. 6

picschessta3

Now, White has to consider other alternatives to come out of the precarious situation. The most important point worth considering is that there is no reason for panic, when faced with such an attack from the opponent.

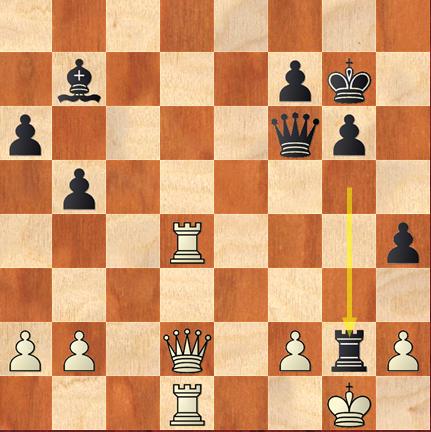
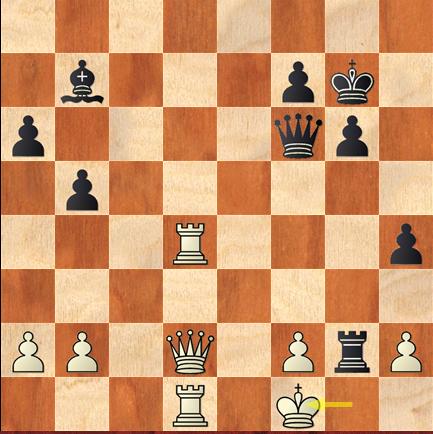
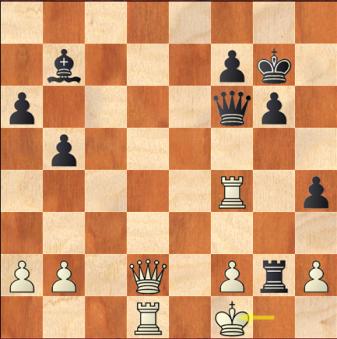
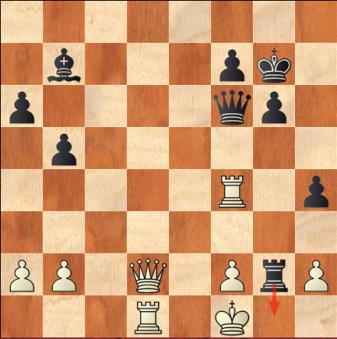
If the Black rook captures g2 and threatens with check, White King can move to f1 and in turn, the black rook might capture the pawn at h2.

Fig. 7

chessgame1
Fig. 8

chessgame2
Fig. 9

chessgame3

There is no imminent threat of mate to the White King, and White has some time to develop its own pieces and try to force a counter-attack on the Black King.

In any case, there is absolutely no reason for panic. It is here that the need for counter attack and tactics arises.

What are the options available to White at this juncture – not only to defend his pieces but also counter-attack the Black King – as the saying says – Attack is the best form of defence – in this case counter attack on the part of White.

A closer look of the position makes it clear to the naked eye that the Black King is placed at g7 and the only option available to White to attack the Black King is through the diagonal a1-h8.

Fig. 10

cesssa1
Fig. 11

chess_tacticalposition2

Realizing that point, white preferred to move the rook at d4 to f4. In response, Black, as anticipated, black rook at g5 captured the pawn at g2 and threatened the white king with a check. The white king at g1 promptly moved to f1. The Black Queen, further exerting pressure on the White pieces, moved the Queen from f6 to g5.

30. Rf4 Rxg2+
31. Kf1 Qg5 (with an idea of moving the rook to g1)

Fig. 12

tacticalpos1

Fig. 13

tacticalpos2

Fig. 14

tacticalpos3

Fig. 15

tacticalpos4

Continue reading Part 3 of Do not panic – Tactics are present even if they are not visible..